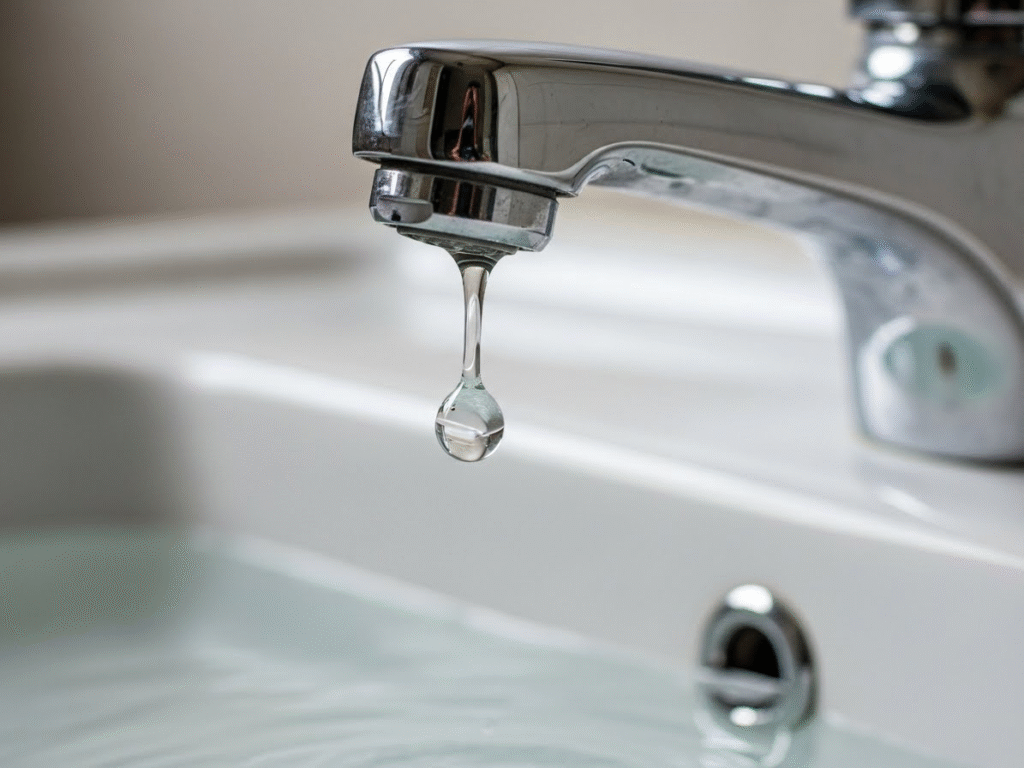
That constant drip… drip… drip is more than just an annoying sound; it’s the sound of money and water going right down the drain. But calling a plumber for a simple leak can feel like overkill. What if you could fix it yourself in under an hour? You can! This guide will empower you to tackle that leaky faucet, save money, conserve water, and gain a valuable new DIY skill. Let’s get started and bring some peace and quiet back to your bathroom.
Why You Shouldn’t Ignore That Drip
A small leak might seem harmless, but it adds up—fast. A faucet dripping just once per second can waste over 3,000 gallons of water per year! That’s enough water for more than 180 showers. Fixing it promptly not only lowers your water bill but also prevents potential water damage and ugly mineral stains in your sink basin.
First Things First: Identify Your Faucet Type
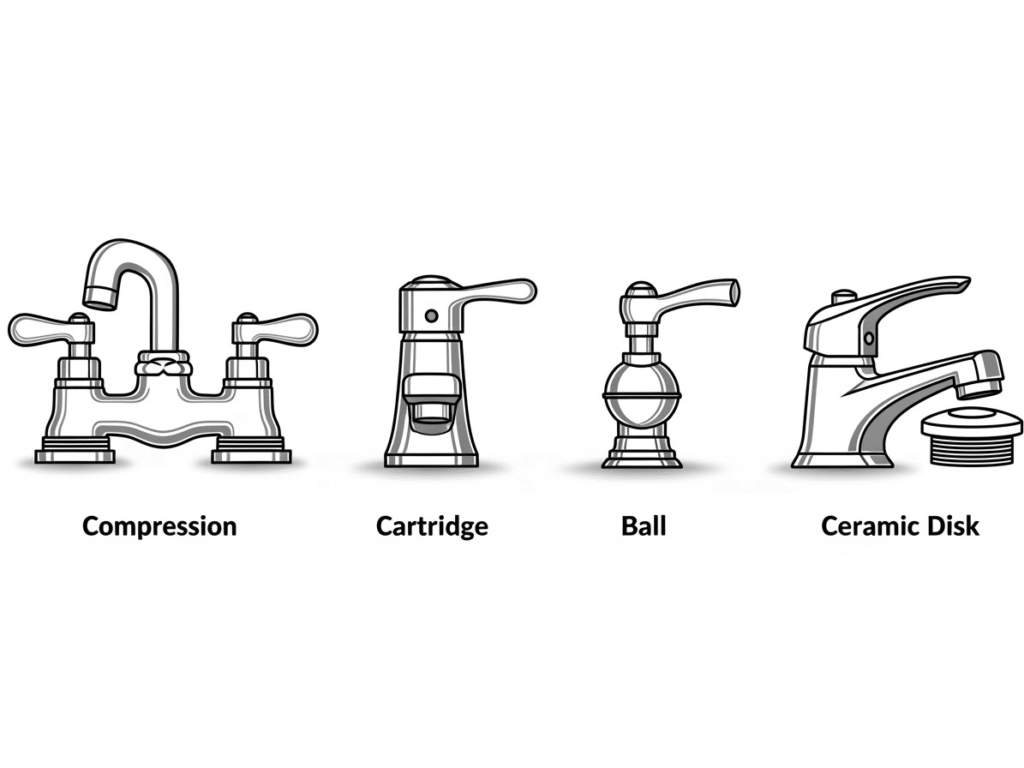
Before you can buy parts or start unscrewing things, you need to know what kind of faucet you have. Most bathroom leaks are caused by a worn-out internal part, and that part is specific to your faucet’s mechanism.
Whether you have a sleek single handle on a modern double-sink bathroom vanity or a classic two-handle setup, it likely falls into one of these four categories:
| Faucet Type | How to Identify It | Common Leak Cause |
| Compression | Two separate handles for hot and cold that you tighten down to stop the flow. The oldest style. | Worn-out rubber washers. |
| Cartridge | Single or double handles that feel smooth to operate, without much turning resistance. | A worn-out O-ring or a faulty cartridge. |
| Ball | A single handle that moves over a rounded, ball-shaped cap at the base of the faucet spout. | Worn-out rubber seals or a loose adjusting ring. |
| Ceramic Disk | A single lever that moves with a modern, smooth action. Often heavier and more durable. | Worn-out seals at the base of the cylinder. |
Pro Tip: If you’re unsure, take a few clear photos of your faucet from different angles before heading to the hardware store. The staff can often identify it for you.
What You’ll Need: Your DIY Faucet Fix Toolkit
Gathering your tools before you start makes the whole process smoother and prevents a mid-project scramble. You likely have most of these already.
Essential Tools & Materials
- Adjustable Wrench: For loosening and tightening nuts of various sizes.
- Screwdriver Set (Phillips and Flathead): For removing handle screws, which are often hidden under a decorative cap.
- Allen Keys (Hex Keys): Some modern faucet handles are secured with a small hex-head screw.
- Replacement Parts: This is the key! Depending on your faucet type, you’ll need a new O-ring, washer, cartridge, or seal kit. It’s best to buy a variety pack if you’re unsure.
- Rags or a Small Towel: For soaking up residual water and protecting your sink from scratches.
- A Small Bowl or Magnetic Tray: Crucial for holding tiny screws and parts so they don’t get lost.
Optional but Helpful
- Basin Wrench: A specialized tool for reaching the nuts that hold the faucet to the sink. You won’t need this for a simple drip fix but it’s essential if you’re replacing the whole unit.
- Flashlight or Headlamp: It can be dark under the sink! Good lighting makes a huge difference.
- White Distilled Vinegar & a Soft Brush: For cleaning mineral buildup off the parts you remove.
The Step-by-Step Guide to a Drip-Free Faucet
Ready to get hands-on? Follow these steps carefully for a leak-free result.
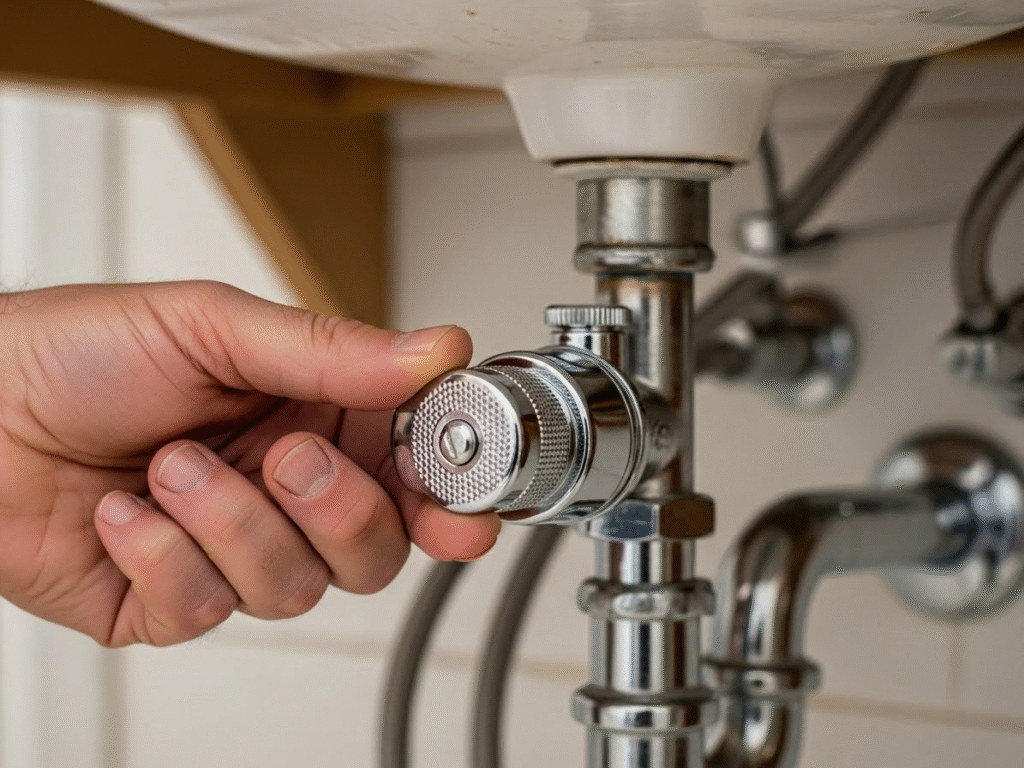
Step 1: Turn Off the Water Supply (The Most Important Step!)
Before you loosen a single screw, you must shut off the water to the faucet. Ignoring this step will result in a geyser in your bathroom.
- Action: Look for two small valves under the sink, one for the hot water line and one for the cold. Turn them clockwise until they are firmly closed. They are usually oval-shaped or small wheel-like handles.
- Reasoning: This stops water from flowing to the faucet, allowing you to work on it without causing a flood.
- What if my valves are stuck or I don’t have them? If the valves are stiff, try wiggling them gently. If they won’t budge or aren’t there, you’ll need to turn off the main water supply to your entire home. This valve is usually located in a basement, utility closet, or near your water meter.
Step 2: Plug the Drain and Clear the Area
This simple prep step is a true lifesaver that separates beginners from pros.
- Action: Place a drain plug or a rag in the sink drain. Clear away any toothbrushes, soap dishes, or clutter from the sink area.
- Reasoning: Faucets contain tiny, essential screws and clips that are incredibly easy to drop. Plugging the drain ensures that if one falls, it won’t be lost forever in your plumbing. Clearing the area gives you a clean, safe workspace.
Step 3: Remove the Faucet Handle(s)
Now it’s time for the “surgery.” The way you remove the handle depends on its design.
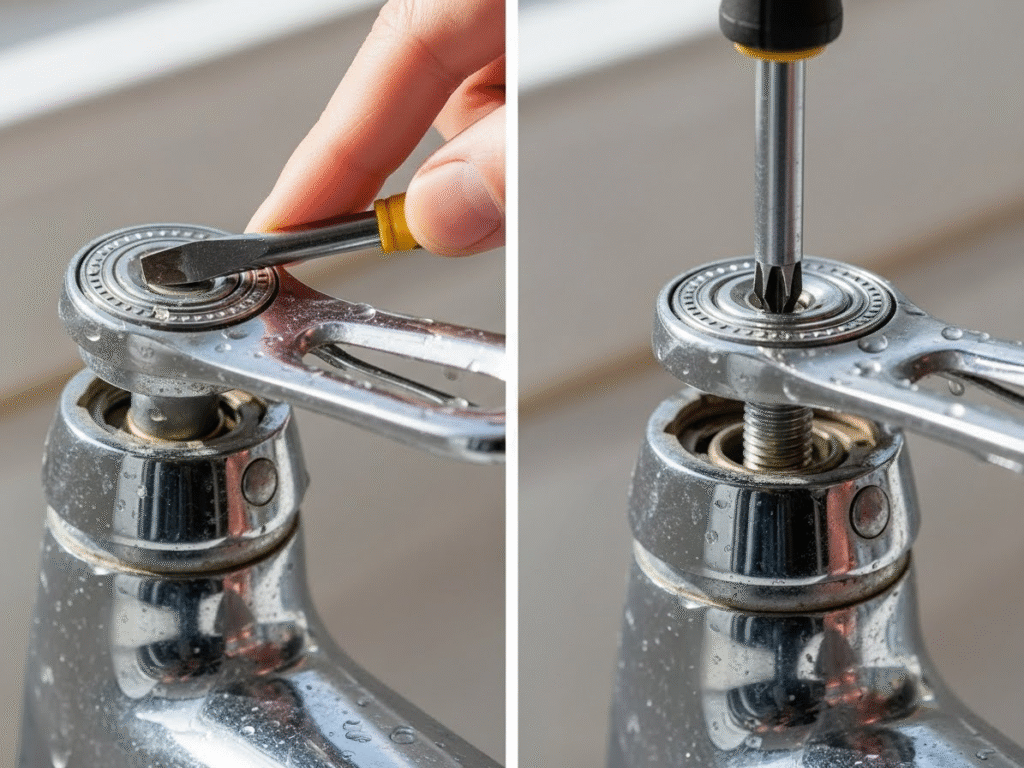
- Action: Look for a small decorative cap on the top or side of the handle. Carefully pry this cap off with a flathead screwdriver (you can wrap the tip in a rag to prevent scratching). Underneath, you’ll find a screw. Use the appropriate screwdriver or Allen key to loosen and remove it. Once the screw is out, you should be able to lift the handle straight off.
- Reasoning: The handle is a decorative cover for the faucet’s functional mechanism. Removing it gives you access to the parts that control water flow—and the parts that cause leaks.
- If it’s stuck: Mineral deposits can “glue” a handle in place. Don’t force it! Gently wiggle it back and forth or tap the base lightly with the rubber handle of your screwdriver to loosen it.
Step 4: Expose the Inner Workings
With the handle off, you’ll see the top of the faucet’s inner mechanism. This is where the different faucet types really diverge.
- For a Compression Faucet: You’ll see a packing nut. Use your adjustable wrench to loosen and remove it. Underneath, you’ll find the stem. Unscrew the stem to reveal the seat washer and O-ring at its base.
- For a Cartridge Faucet: You may see a decorative retaining clip or nut holding the cartridge in place. Remove it. The cartridge itself is a plastic or brass cylinder. You should be able to pull it straight out with pliers.
- For Ball or Ceramic Disk Faucets: These are similar to cartridge faucets. You’ll need to remove a cap and collar to expose the ball mechanism or ceramic disk cylinder.
- Expert Tip: Take a picture with your phone at each stage of disassembly. This creates a visual guide for reassembly and ensures you don’t forget where that tiny, mysterious clip goes.
Step 5: Identify and Replace the Faulty Part
This is the moment of truth! Inspect the parts you just removed. The culprit is usually obvious.
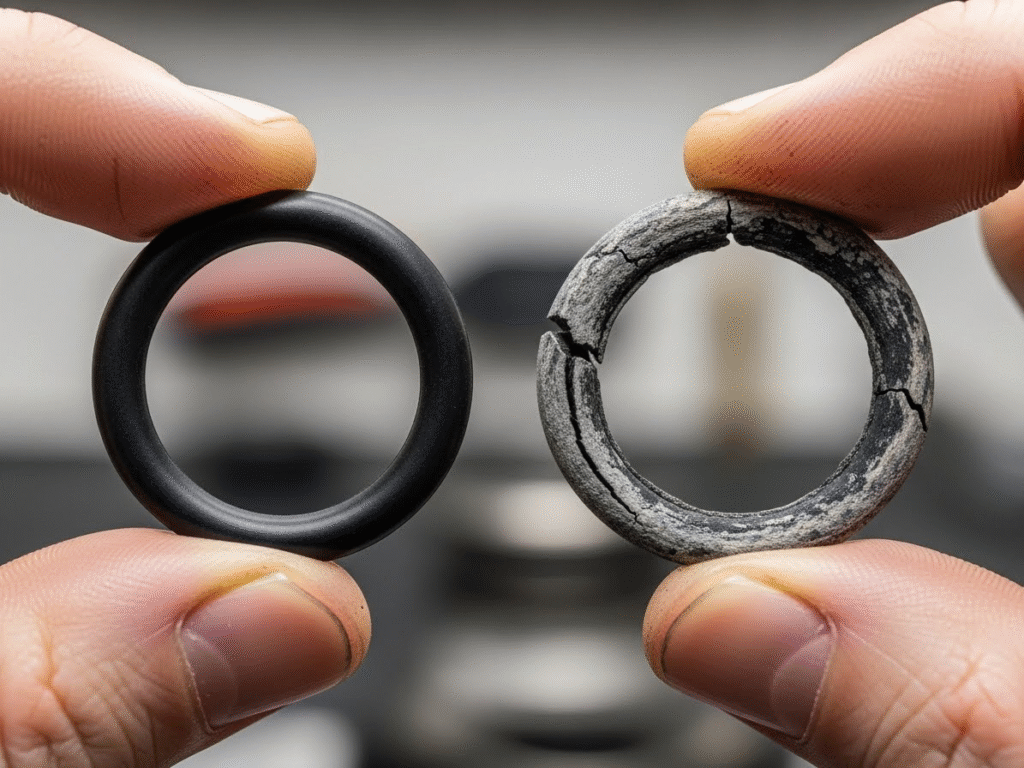
- Action: Look for the small rubber parts—the O-rings and washers. Is one of them cracked, flattened, or visibly worn down? That’s your leak. For cartridge, ball, or disk faucets, the entire unit is often the problem. Carefully replace the worn-out part(s) with their exact new counterparts from your repair kit. A tiny dab of plumber’s grease on the new O-rings can help them seal better and last longer.
- Reasoning: These small rubber or plastic components create the watertight seals inside your faucet. Over time, constant pressure and movement wear them down, allowing water to seep through, causing a drip.
Step 6: Reassemble and Test Your Work
You’re on the home stretch! Now, just put everything back together in the reverse order you took it apart. (This is where those photos you took come in handy!)
- Action: Re-insert the new cartridge or stem. Tighten the retaining nut or packing nut until it’s snug—but do not overtighten! This can damage the new parts. Place the handle back on and secure it with its screw and cap.
- Final Test: Turn the water supply valves under the sink back on (turn them counter-clockwise). Turn them on slowly to allow the pipes to refill without a sudden “water hammer” jolt. Now, turn the faucet on and off. Look and listen. Is the drip gone? Check around the base of the faucet for any new leaks.
- Reasoning: Reassembling carefully ensures all seals are seated correctly. Turning the water on slowly prevents pressure shocks to your plumbing and gives you time to spot any issues before they become major gushes.
Congratulations, you did it! Enjoy the sweet sound of silence.
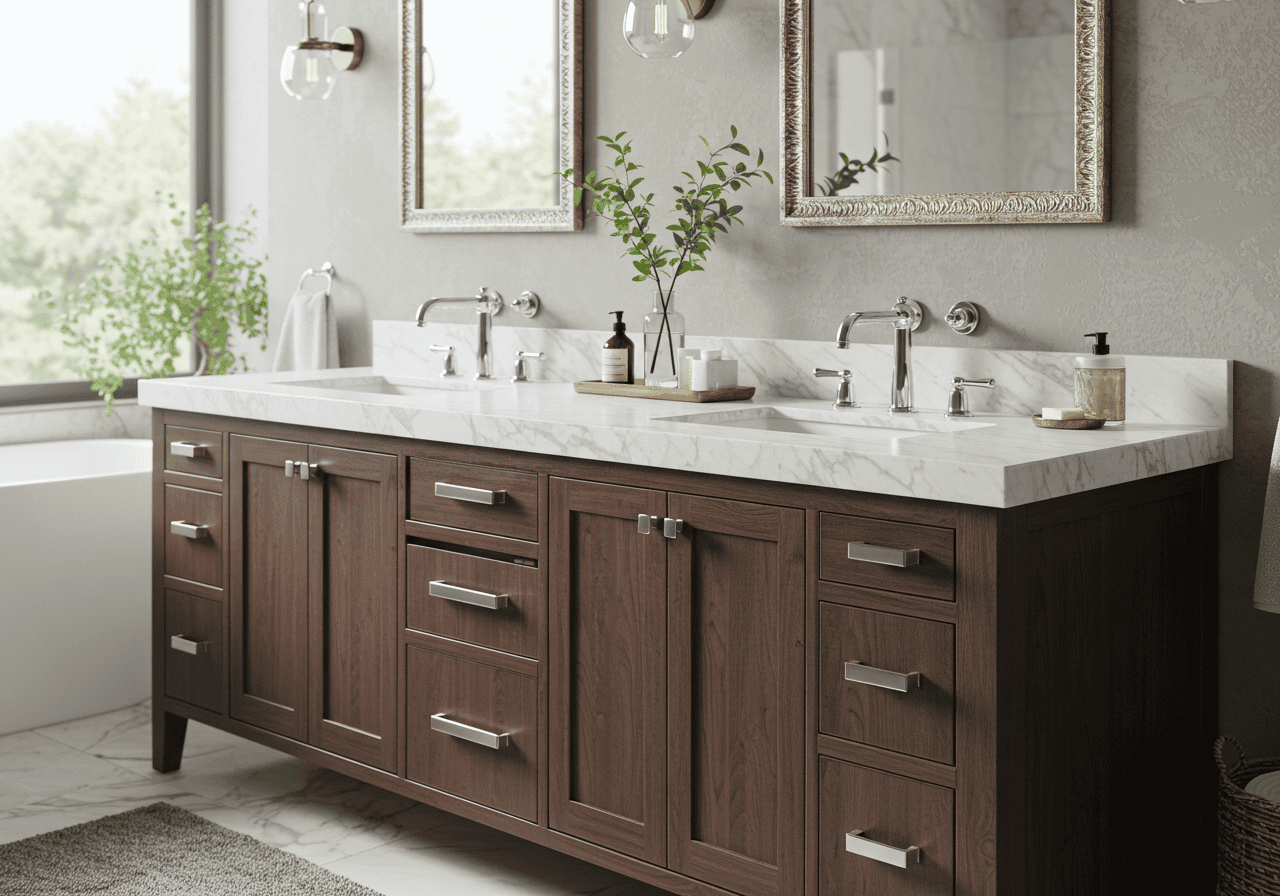
Upgrade While You’re At It: A Designer’s Touch
Now that you have DIY confidence, why stop at a repair? A new faucet can dramatically change the look of your bathroom. If your old one is dated, this is the perfect time for an upgrade.
- Match Your Style: A faucet is a key “jewelry” piece. For a mid-century modern bathroom, look for clean lines and a chrome finish. An Art Deco bathroom shines with bold, geometric shapes in polished brass. And for that perfect boho bathroom idea, an aged bronze or matte black faucet can provide a beautiful, earthy accent.
- The 60-30-10 Rule: Think of your faucet as part of your 10% accent color. In a room with 60% neutral tiles and 30% a vanity color, a striking gold bathroom decor faucet can be the 10% that makes the whole space pop.
- Rental-Friendly Tip: Replacing a faucet is usually not rental-friendly. However, a deep clean of the existing one can make it look new. Use vinegar and a soft brush to remove mineral buildup from the aerator (the little screen where water comes out). This can also improve water pressure!
Budget Breakdown: Repair vs. Replace
Is it always better to repair? Here’s a quick look at the costs.
| Option | Estimated Cost | Time Required | Pros | Cons |
| DIY Repair | $5 – $25 | 30-60 minutes | Inexpensive, satisfying, builds skills. | Requires a little patience; might not fix deeper issues. |
| Call a Plumber | $150 – $350 | 1-2 hours | Professional, guaranteed work. | Expensive for a simple fix. |
| Full Replacement | $50 – $500+ | 1-3 hours (DIY) | Upgrades style and function, long-term solution. | Most expensive, more complex installation. |
Common Mistakes to Avoid (And How to Fix Them)
- Mistake: Overtightening connections.
- The Fix: The rule is “hand-tight, then a quarter-turn with a wrench.” Overtightening can crack the faucet body or strip the threads. If you’ve overtightened, you may need to replace the part you damaged.
- Mistake: Scratching the finish with your tools.
- The Fix: Always wrap the jaws of your wrench with a rag or painter’s tape when working on visible, finished parts. If you already made a small scratch, a finish-specific touch-up pen may be available from the manufacturer.
- Mistake: Buying the wrong replacement parts.
- The Fix: This is the most common pitfall! Always take the old parts (or at least clear photos of them) to the hardware store to get an exact match. If you’ve already reassembled with the wrong part, you’ll have to take it apart again.
Frequently Asked Questions (FAQs)
1. I replaced the parts, but my faucet is still dripping! What now?
This can happen for two reasons. First, a piece of sediment or debris might be stuck in the faucet body, preventing the new parts from sealing. Disassemble again and flush the faucet body with water. Second, the “valve seat” (the part the washer presses against) might be corroded. This sometimes requires a special “seat wrench” to replace.
2. How do I know which brand or model my faucet is?
Look closely at the base of the faucet or on the back of the spout for a brand name like Moen, Delta, or Kohler. If there’s no name, take a picture of it—the unique shape is often enough for a hardware store pro to identify the type of parts you need.
3. My faucet is leaking from the base, not the spout. Is this the same fix?
It’s a very similar fix! A leak at the base is almost always caused by worn-out O-rings at the bottom of the spout. Follow the same steps, but when you disassemble, focus on lifting the entire spout off the faucet body to access and replace the O-rings on the main housing.
4. Is it better to just replace the whole faucet instead of repairing it?
If your faucet is over 15-20 years old, constantly needs repairs, or is heavily corroded, a full replacement is a smart investment. For a younger faucet with a simple drip, a repair is far more cost-effective. A new faucet can also be a key element in creating a stunning luxury bathroom design.
5. Can I use any brand’s replacement cartridge in my faucet?
No, cartridges are highly brand- and model-specific. You must use the exact replacement cartridge designed for your faucet, as they are not interchangeable.
Final Checklist for a Drip-Free Faucet
Use this quick summary to guide you through the process.
- Identify your faucet type (compression, cartridge, ball, or disk).
- Gather all your tools and replacement parts.
- Shut off the water supply valves under the sink.
- Plug the sink drain to catch any dropped parts.
- Disassemble the handle and faucet body, taking photos as you go.
- Replace the old, worn-out washers, O-rings, or cartridge.
- Reassemble everything carefully in reverse order.
- Turn water on slowly and check for any leaks.
- Enjoy the peace and quiet