
Let’s be honest, small bathrooms can feel a bit… challenging. Cramped quarters, awkward layouts, and the feeling that you just can’t fit everything you want in the space you have. But what if we told you that tiny bathroom could become your favorite sanctuary? Enter the walk-in shower – a sleek, stylish, and surprisingly space-savvy solution!
Ditching the bulky tub or a high-threshold shower base visually opens up the room, creating an airy, seamless feel that instantly elevates even the most compact bathroom. Walk-in showers aren’t just practical; they offer a touch of luxury and endless design possibilities.
Ready to transform your small bathroom into a spa-like retreat without tearing down walls? We’ve curated 21 small bathroom walk-in shower ideas packed with inspiration, practical tips, and serious style. Whether your taste leans modern minimalist, cozy farmhouse, or even a touch of free-spirited flair (perhaps some boho bathroom ideas could inspire your shower tile choices?), there’s something here for you.
Let’s dive in and discover how to make a big impact in a small space!
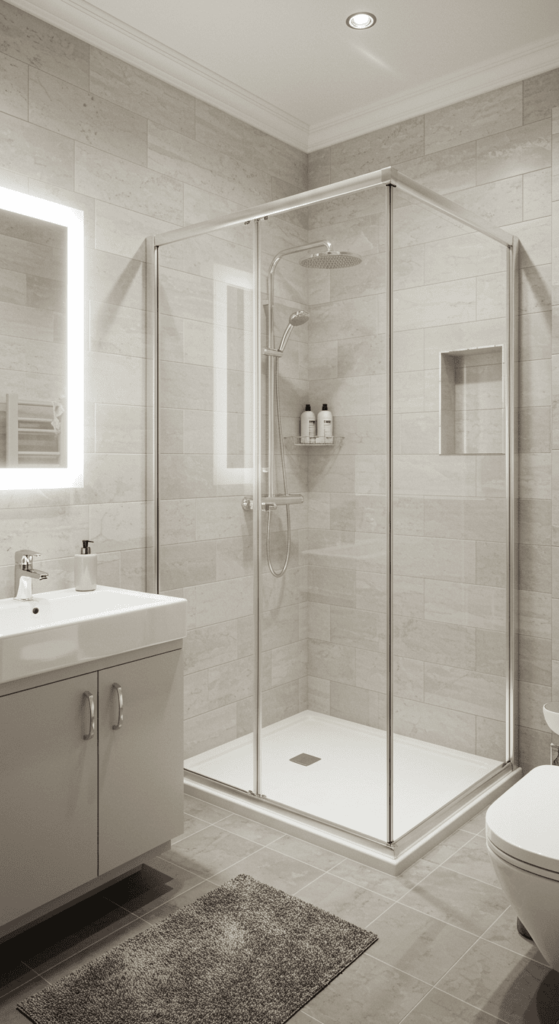
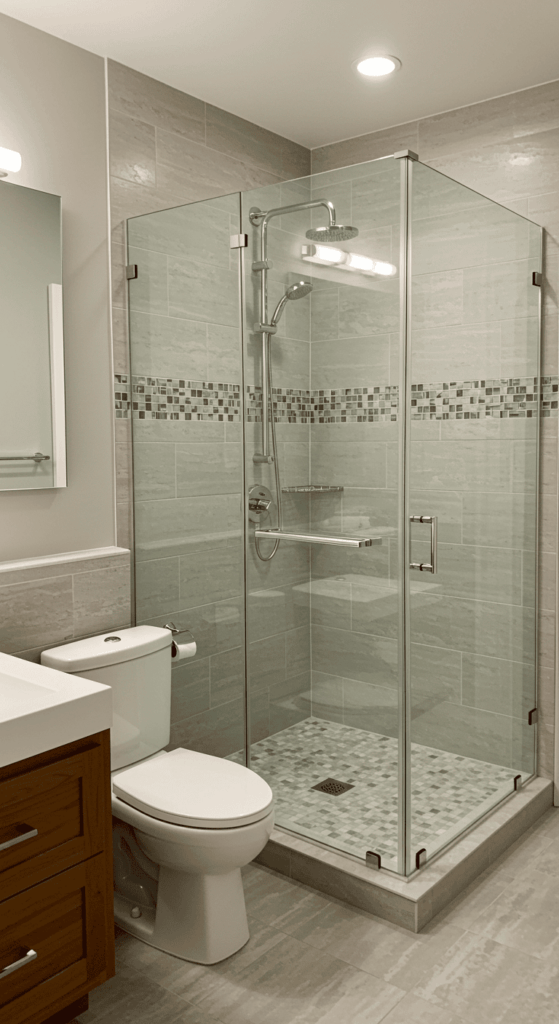
1. Embrace the Corner: The Neo-Angle Nook
Corners are often underutilized real estate in small bathrooms. A neo-angle walk-in shower fits snugly into this space, typically featuring two fixed glass panels meeting the walls and a door that cuts diagonally across the corner.
- Why it works: This angled design minimizes the shower’s footprint in the main bathroom area, preserving precious floor space for traffic flow and maybe even that stylish vanity you’ve been eyeing. It feels less intrusive than a square shower box plonked in the middle of a wall.
- Expert Tip: Always opt for frameless clear glass panels and doors. Frames and frosted glass can visually shrink the space, while clear glass maintains sightlines and enhances the feeling of openness, letting light flow freely.
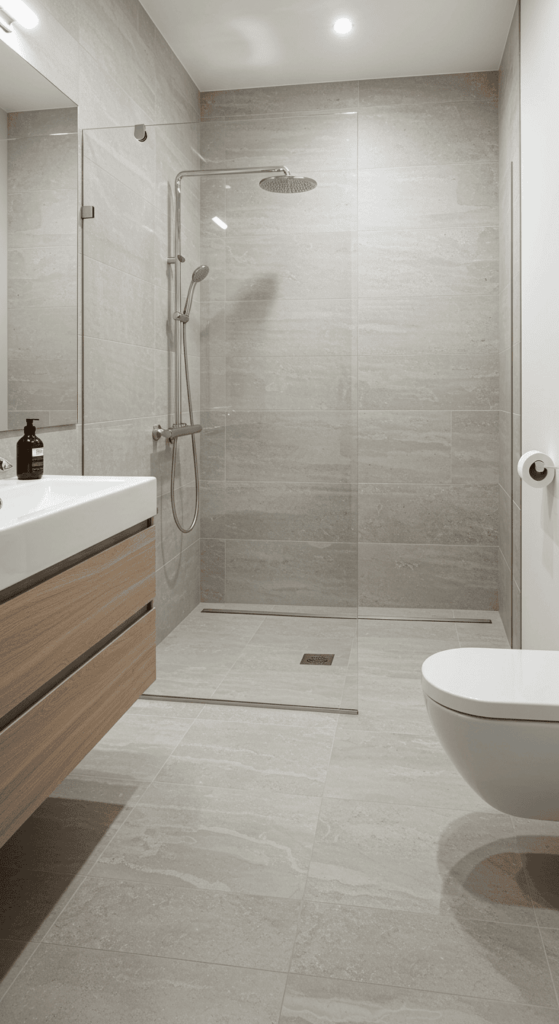
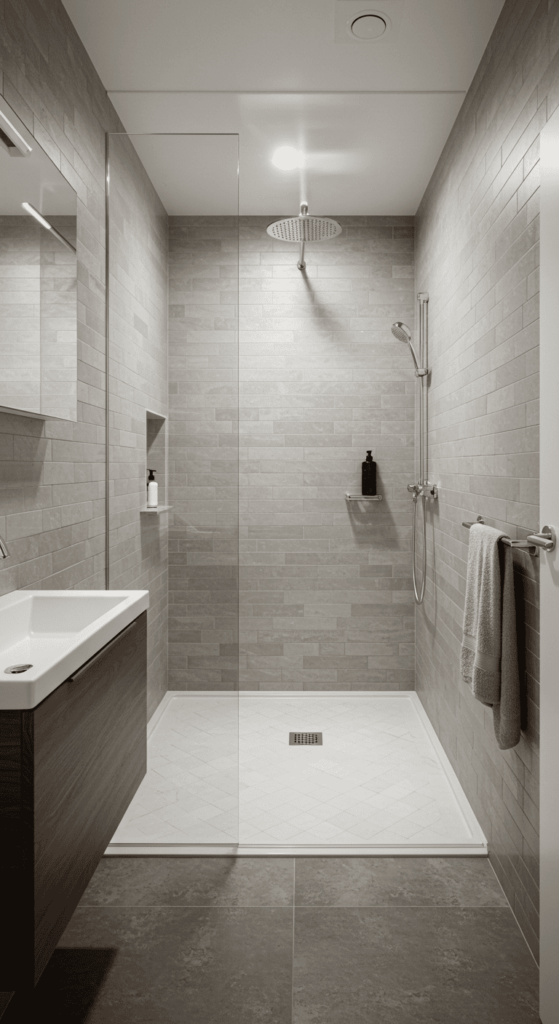
2. Go Seamless: Continuous Flooring for a Wet Room Feel
Want the ultimate space-enhancing illusion? Run the same floor tile straight from your main bathroom area into the walk-in shower, eliminating the traditional curb or threshold. This creates an unbroken visual plane, making the entire bathroom floor appear larger and more cohesive.
- The Magic: This curbless shower approach lends a high-end, wet-room aesthetic that feels incredibly spacious and modern. It’s also a fantastic accessibility feature, removing trip hazards.
- Key Consideration: Proper waterproofing beneath the tiles and a subtle, carefully planned slope towards the drain (often a sleek linear drain placed against a wall) are absolutely crucial for effective water management. Don’t skimp on professional installation here!
- Tile Tip: Choose a gorgeous, non-slip floor tile for safety and style. Need inspiration? Explore these fantastic bathroom tile design ideas.
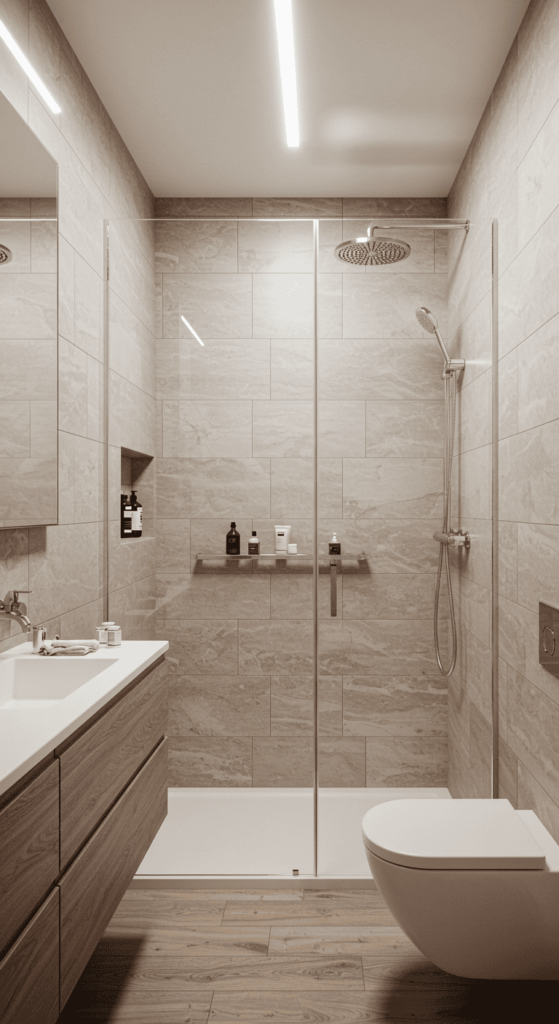
3. Keep it Simple: The Single Glass Panel Power Play
Sometimes, less is definitely more, especially in tight quarters. Instead of a full enclosure with a door, consider using just a single fixed glass panel to separate the shower zone from the rest of the bathroom.
- Minimalist Marvel: This ultra-minimalist approach defines the shower space without visually chopping up the room. It allows light and sightlines to pass through freely, making the bathroom feel incredibly open, airy, and contemporary. It works particularly well in long, narrow bathrooms where the shower occupies one end.
- Practical Point: Ensure the panel is wide enough (generally at least 30-36 inches / 75-90 cm) and strategically placed relative to the showerhead to contain the majority of water splashes. You might get a little overspray, but the trade-off in visual space can be well worth it.
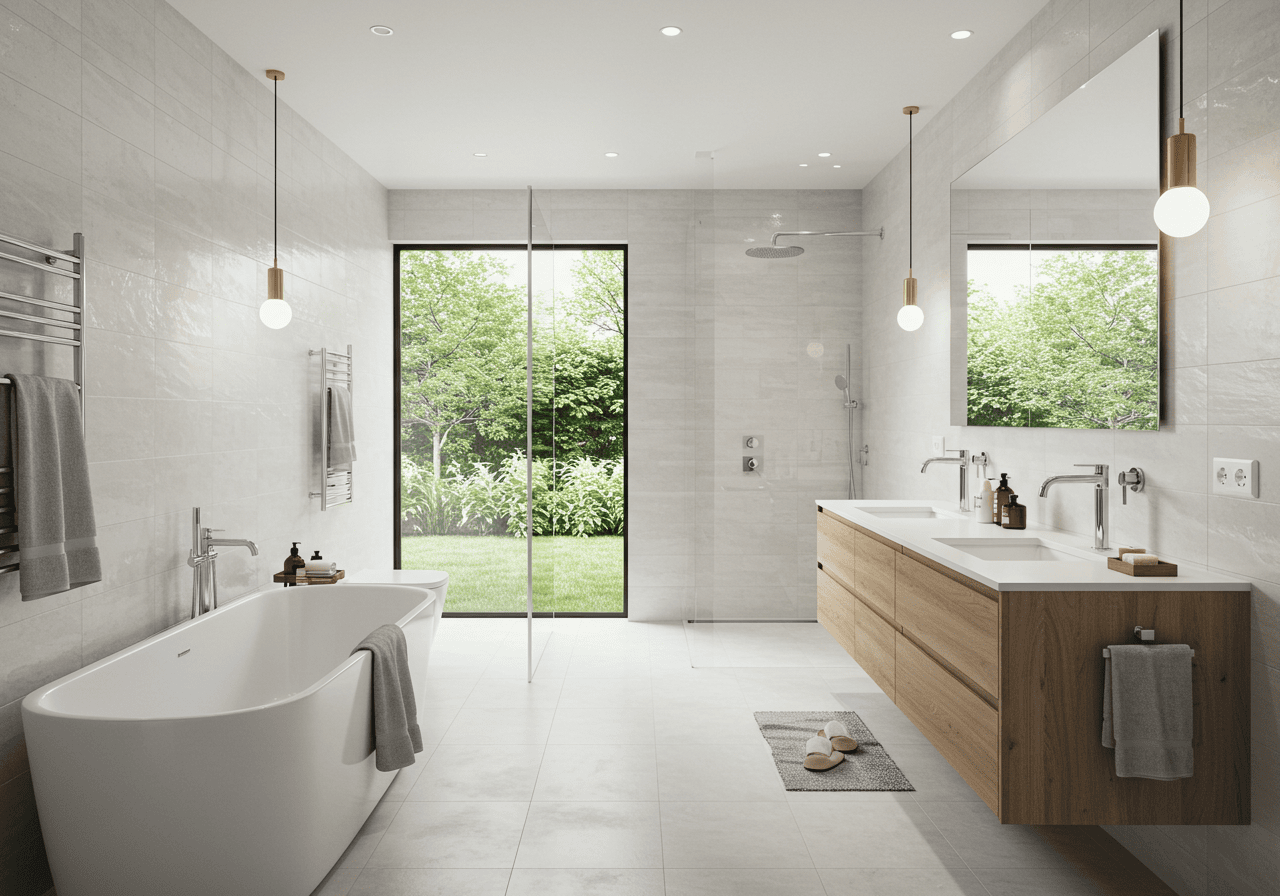
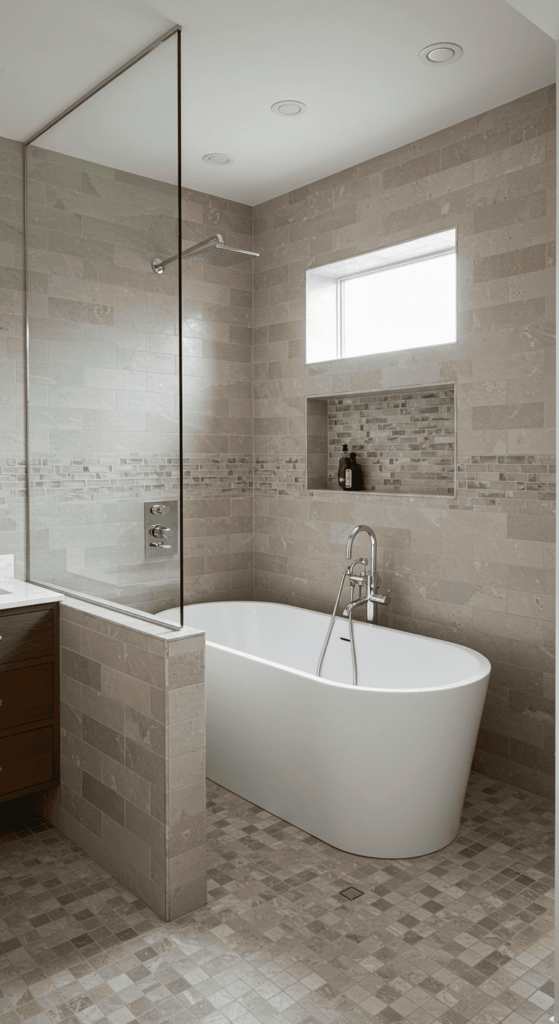
4. The “Wet Room” Combo: Tub Within the Shower Zone
Okay, hear us out – sometimes you really don’t want to give up the bathtub, even in a small bathroom. If space is just generous enough, consider the ultimate space-saving luxury: placing a bathtub inside the walk-in shower’s wet zone.
- Hybrid Heaven: This “wet room” approach designates a larger portion of the bathroom as a fully waterproofed area, containing both the open shower space and a freestanding or built-in tub. It eliminates the need for separate enclosures or divisions, making the room feel much larger and more cohesive.
- Practical Perks: It’s incredibly practical for bathing children (splashes are contained!) or even pets. Cleaning is also streamlined, as the entire zone is designed to get wet. It offers the best of both worlds – a quick shower or a long soak – without demanding excessive square footage for separate zones.
- Key Considerations: This requires meticulous waterproofing (tanking) of the entire wet zone floor and walls. You’ll need effective drainage (often a linear drain works well here) and sufficient space to comfortably use both the shower and tub without feeling cramped. Choose a tub with a relatively compact footprint to maximize usability.
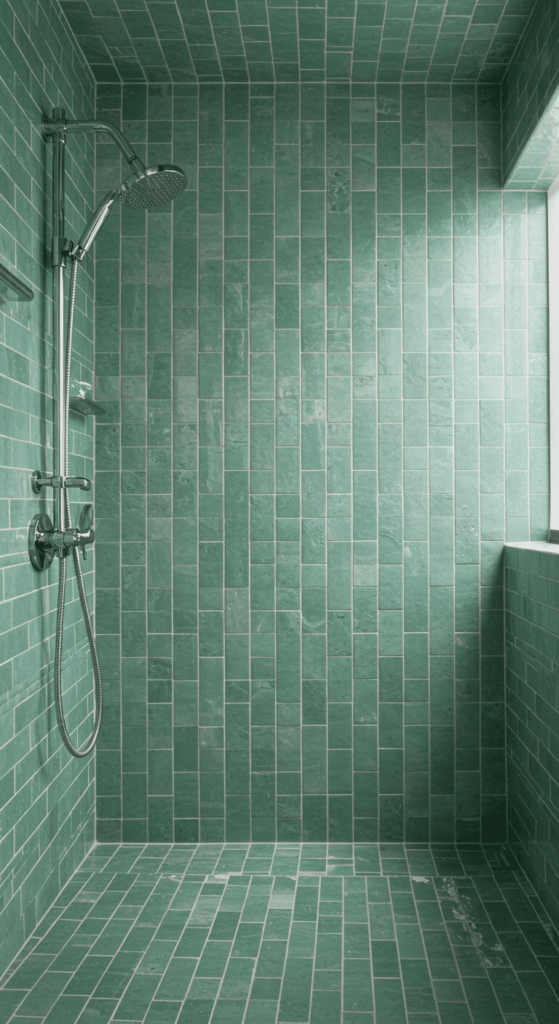
5. Draw the Eye Up: Vertical Tile Installation
Got low ceilings? Create an illusion of height within your walk-in shower by installing your tiles vertically instead of the standard horizontal layout.
- Height Illusion: Running rectangular tiles like subway tiles, or even longer plank tiles, in vertical stacks draws the eye upward automatically. This simple directional shift makes the shower walls – and by extension, the whole bathroom ceiling – feel taller and more spacious.
- Style Factor: This technique adds a subtle but sophisticated design element. You can use a contrasting grout color to really emphasize the vertical lines for a bolder, more graphic look, or stick with a matching grout for a gentler, elongating effect.
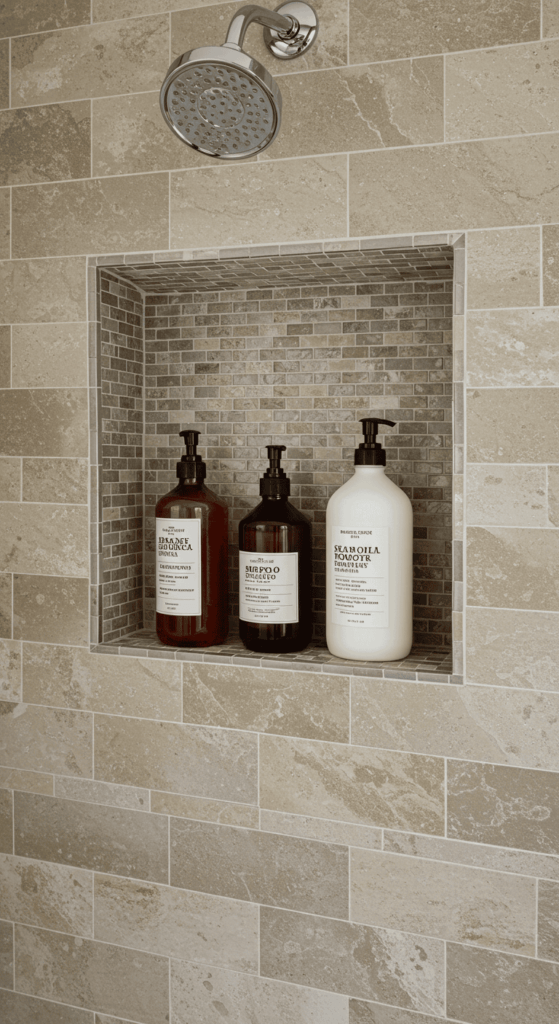
6. Carve Out Storage: The Brilliant Built-In Niche
Where do you put the shampoo, soap, and conditioner in a sleek walk-in shower without cluttering it up with hanging caddies or bulky corner shelves? The answer is elegant and integrated: the built-in shower niche.
- Smart Storage Solution: Recessed directly into the shower wall, these niches provide dedicated storage space without protruding into the shower area. This keeps your essentials neatly organized and easily accessible while maintaining clean lines and maximizing elbow room – crucial in a small walk-in shower.
- Design Opportunity: Don’t just think of it as storage; make it a feature! Line the back of the niche with a contrasting tile – perhaps a pop of color, a bold pattern, or even the same tile used elsewhere in the bathroom for continuity. Add subtle LED strip lighting inside the niche for a truly spa-like glow.
- Placement is Key: Consider the height carefully – you want it convenient for reaching items but high enough to avoid constant water spray. Usually, chest to eye level works well.
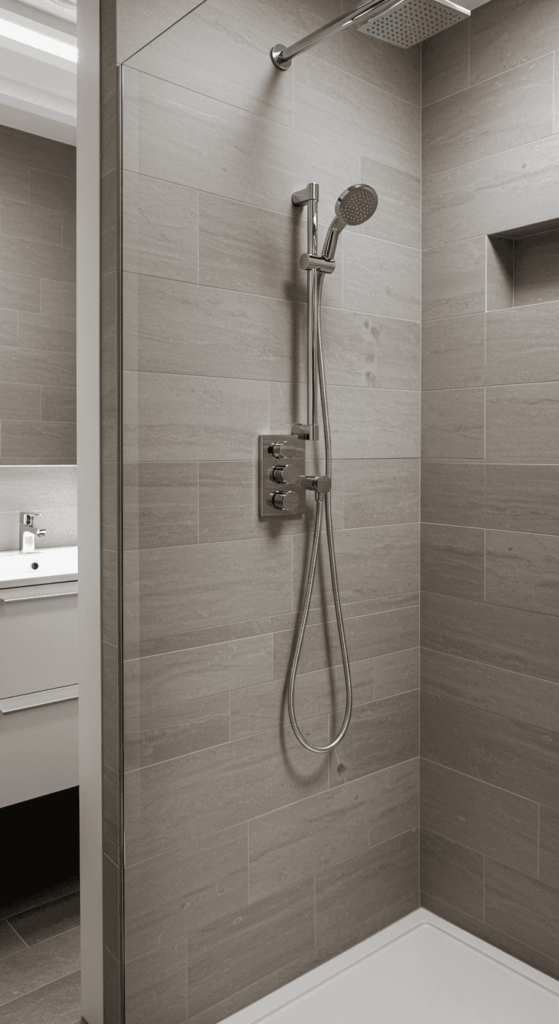
7. Float Your Fixtures: Wall-Mounted Minimalism
Every square inch counts in a small bathroom. One clever way to free up visual (and sometimes actual) floor space is to opt for wall-mounted fixtures both inside and outside the immediate shower area.
- Space-Saving Elegance: Wall-mounted shower controls, showerheads (especially sleek rainfall or handheld options), and even toilets and vanities create a cleaner, more open look. By lifting everything off the floor, you expose more flooring, which tricks the eye into perceiving a larger space.
- Easier Cleaning: Bonus points! With fewer fixtures touching the floor, cleaning underneath becomes significantly easier. No more awkward mopping around toilet bases or vanity legs.
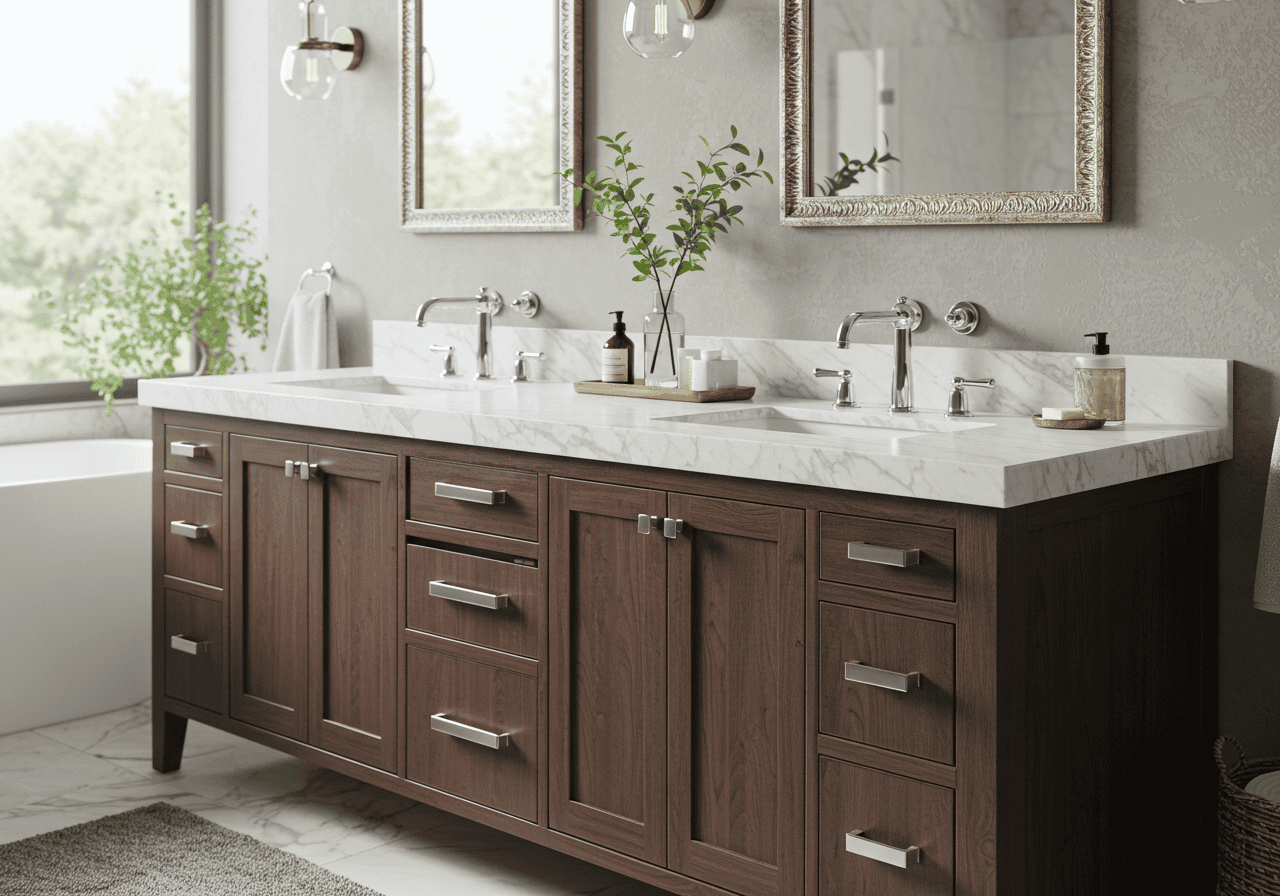
- Consider Pairing: A wall-mounted vanity outside the shower, perhaps even a compact double sink bathroom vanity if space just allows, paired with your walk-in shower, creates a cohesive, high-end feel.
8. Dare to Go Doorless: The Ultimate Open Concept
Taking the single glass panel idea a step further, some layouts allow for a completely doorless walk-in shower. This works best in bathrooms where the shower can be tucked into an alcove or at the end of a longer room.
- Seamless Transition: This design offers the most open and airy feel possible, truly blurring the lines between the shower and the rest of the bathroom. It’s the epitome of minimalist luxury and accessibility.
- Water Containment: Success relies heavily on strategic design. You’ll need sufficient depth or length in the shower area, careful placement of the showerhead (pointing away from the opening), and potentially a slightly sloped floor or a linear drain positioned effectively to prevent water from escaping into the main bathroom area. Sometimes a low curb or a slight change in floor level can help, though the truly seamless look avoids this.
- Layout Dependent: This isn’t suitable for every small bathroom. It requires careful planning regarding dimensions and fixture placement to avoid a splash zone catastrophe!
9. Engage the Senses: Subtle Texture Play
While bold patterns can sometimes overwhelm a small space, incorporating texture is a fantastic way to add depth and interest without sacrificing the feeling of spaciousness.
- Tactile Dimension: Think beyond just glossy or matte. Consider tiles with a subtle relief, a 3D wave pattern, a stone-like texture, or even the natural variations found in materials like slate or travertine (properly sealed, of course!). This adds visual weight and a touch of luxury without busy patterns.
- Mix and Match: You don’t need to use textured tiles everywhere. Create a feature wall within the shower using a textured tile, while keeping the other walls simpler and lighter. This contrast draws the eye and adds character. Even a textured floor tile (great for slip resistance!) can contribute.
- Light Interaction: Textured surfaces interact with light differently than flat ones, creating subtle shadows and highlights that add dimension and warmth to your small shower space.
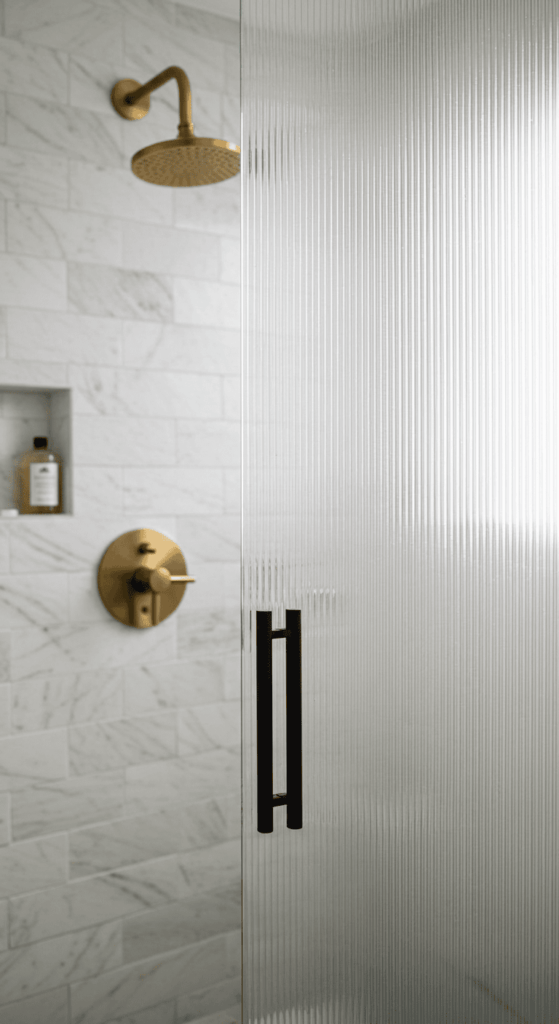
10. Textured Transparency: The Elegance of Reeded or Fluted Glass
Want the light-enhancing benefits of glass but desire a touch more privacy or visual texture than standard clear panels? Enter reeded or fluted glass. This type of glass features vertical grooves or ribs, offering a stylish solution.
- Subtle Screening & Style: Reeded glass beautifully diffuses light and obscures direct views into the shower, providing a degree of privacy without making the space feel closed off like frosted glass can. The vertical texture adds a sophisticated, almost Art Deco or mid-century modern flair that feels both timeless and on-trend.
- Visual Interest: The texture itself becomes a design element, catching the light in interesting ways and adding depth that plain glass lacks. It can make the shower enclosure feel more like a deliberate architectural feature.
- Application Ideas: Use it for the entire shower enclosure, just the door, or even as a fixed panel alongside a clear glass section for a unique mixed-material look. It pairs exceptionally well with both modern minimalist fixtures and more vintage-inspired hardware.
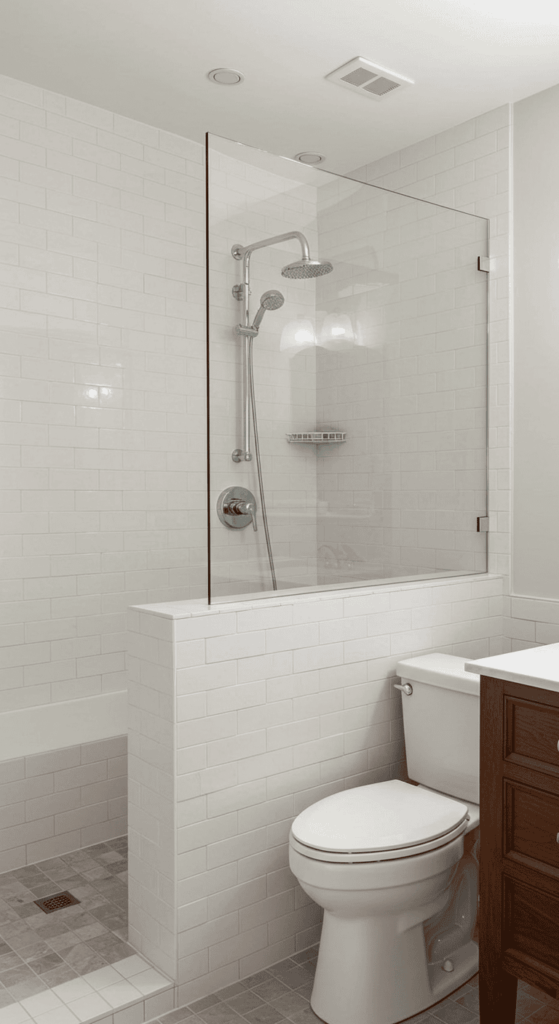
11. The Half-Wall Hero: Balancing Privacy and Openness
Not quite ready for a fully open or glass-enclosed shower? A pony wall (or half-wall) offers a brilliant compromise. This involves building a partial-height wall, often topped with glass, to separate the shower area.
- Best of Both Worlds: The solid lower portion provides some privacy and a sturdy surface (great for mounting fixtures or adding a niche!), while the glass panel above maintains the visual connection to the rest of the bathroom, preventing the shower from feeling boxed in.
- Defining the Zone: It clearly delineates the wet area without erecting a full visual barrier. This structure can also cleverly conceal plumbing pipes if needed.
- Design Integration: Tile the half-wall to match the rest of the shower or use it as an opportunity to introduce a complementary tile. Topping it with a sleek quartz or stone slab adds a polished finishing touch before the glass begins.
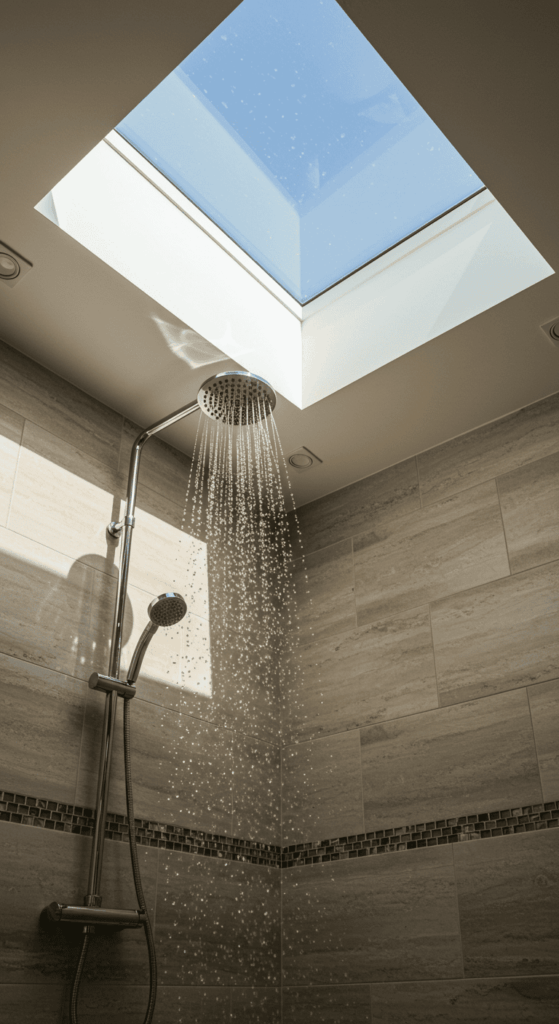
12. Skylight Sensation: Let the Sunshine In
If your small bathroom is located on the top floor or has attic space above, incorporating a skylight directly over the walk-in shower can be a game-changer.
- Natural Light Flood: Nothing makes a space feel larger and more inviting than abundant natural light. A skylight bathes the shower in sunshine (or moonlight!), creating an incredibly airy and uplifting atmosphere. It dramatically reduces the need for artificial lighting during the day.
- Enhanced Ventilation: Many skylights are operable, meaning they can be opened to provide excellent ventilation, helping to quickly clear steam and prevent moisture buildup – a common issue in small bathrooms.
- Privacy Preserved: Since the light source is overhead, you gain brightness without compromising privacy from neighbors. Ensure it’s properly sealed and installed to prevent leaks!
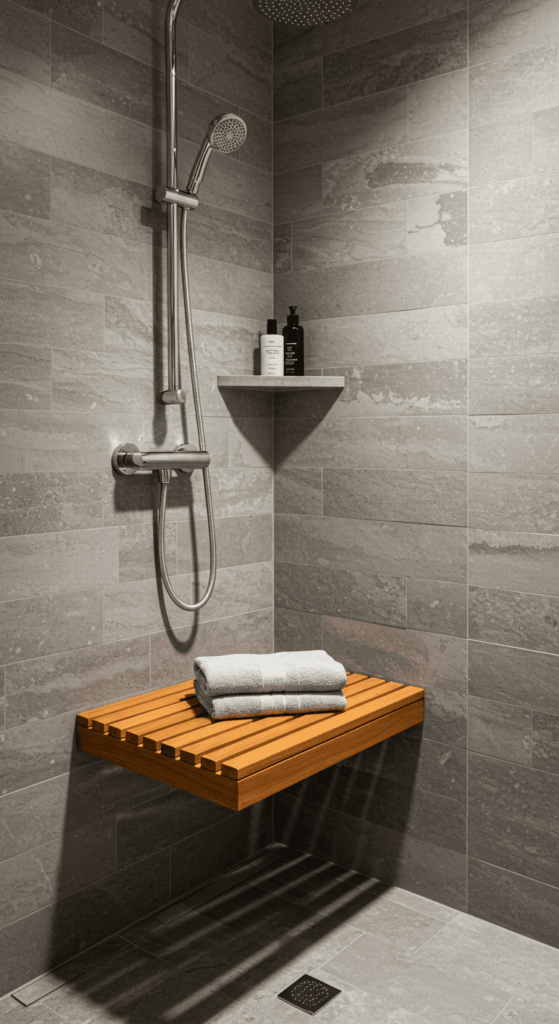
13. Bench Bliss: A Touch of Spa-Like Comfort
Who says small showers can’t have luxurious features? Adding a built-in or floating bench provides comfort, convenience, and a high-end spa feel, even in compact spaces.
- Practical Perch: A bench offers a place to sit while showering (great for leg-shaving or simply relaxing under the water), or serves as handy storage for toiletries if a niche isn’t enough.
- Space-Smart Options:
- Built-in: A solid bench constructed along one wall, tiled to match the shower, feels substantial and integrated.
- Floating: A bench attached securely to the wall studs with concealed supports looks lighter and more modern, preserving floor space underneath.
- Folding: For the tiniest showers, a wall-mounted fold-down bench provides seating when needed and tucks away neatly when not in use.
- Material Matters: Choose durable, water-resistant materials like tile, stone (quartz, granite), or teak wood (naturally water-resistant).
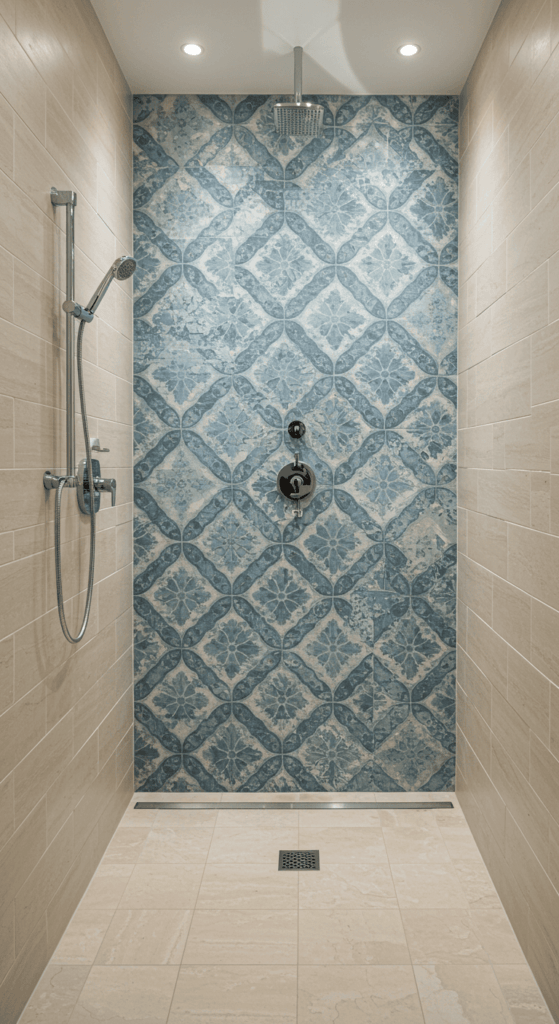
14. Strategic Pattern Pop: Make a Statement Wall
While wall-to-wall busy patterns can shrink a small space, using a bold or intricate tile pattern strategically on just one wall within the shower can add major personality without overwhelming the room.
- Focal Point Feature: Designate one wall – often the one furthest from the entrance or the one housing the shower fixtures – as your feature wall. Clad this wall in a striking geometric, encaustic-style, mosaic, or uniquely shaped tile.
- Balance is Key: Keep the other shower walls and the bathroom floor relatively simple and light in color. This contrast allows the patterned wall to truly shine and become the star of the show, drawing the eye and adding depth.
- Vertical Impact: Even a patterned stripe running vertically can help elongate the space while introducing visual interest. Think about a band of colorful mosaic tiles running from floor to ceiling behind the shower controls.
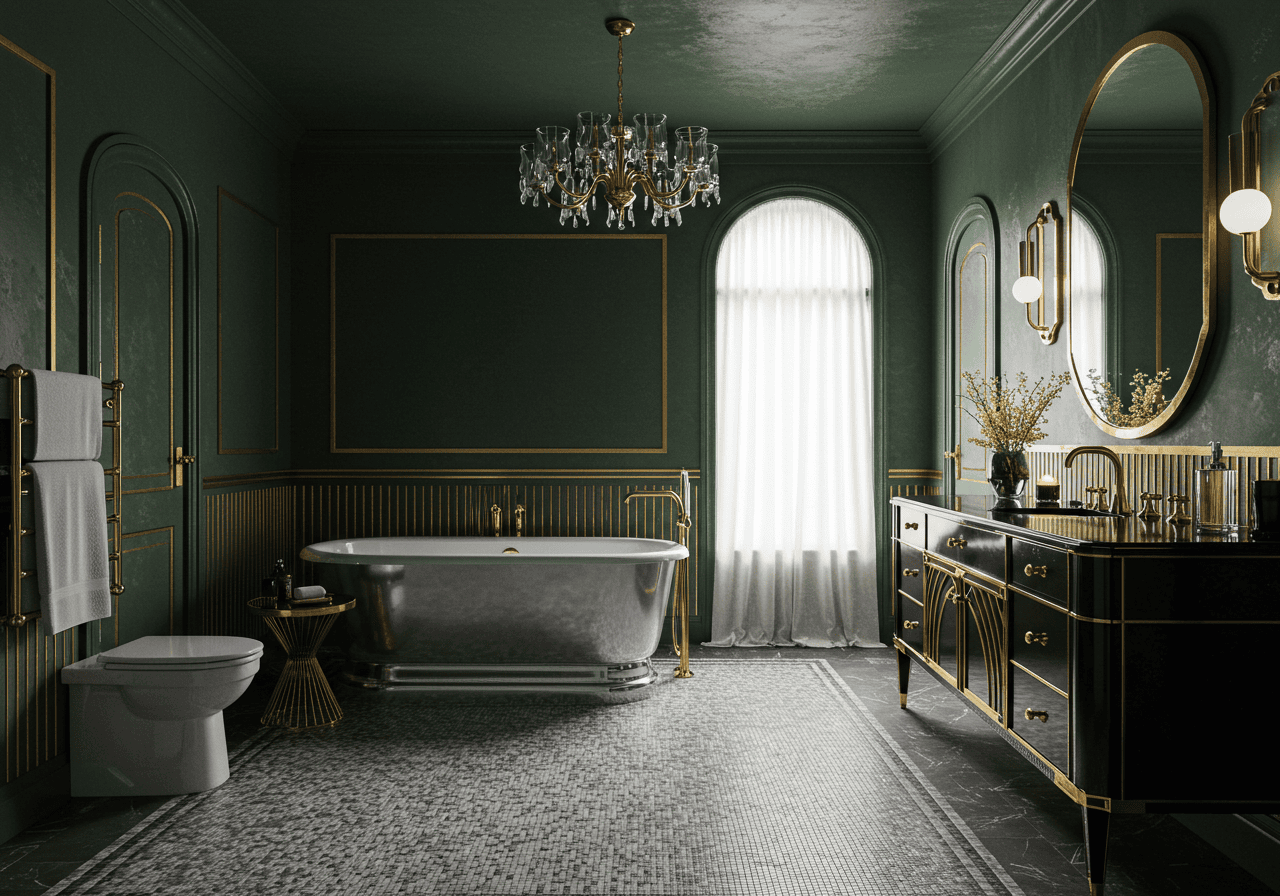
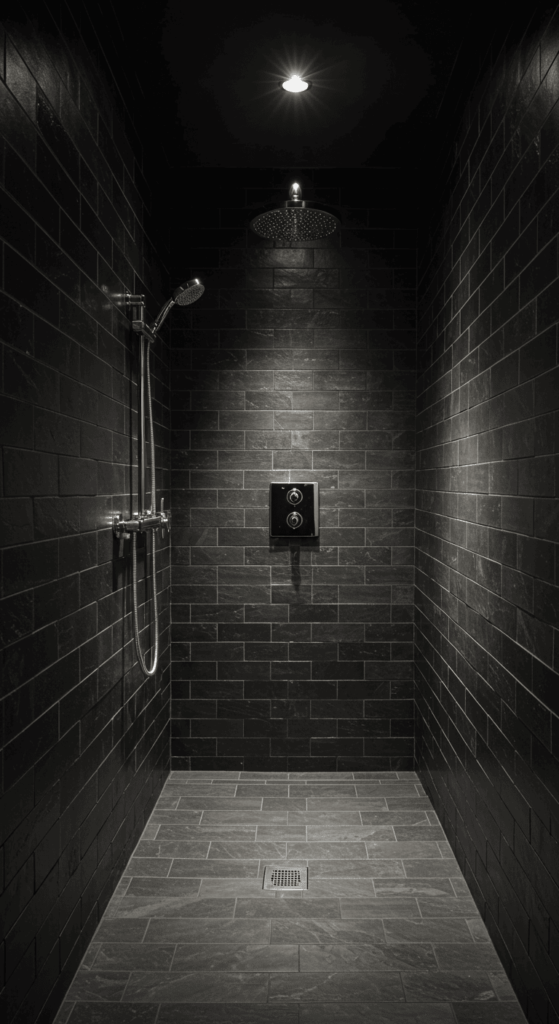
15. Dark & Dramatic (Used Wisely): Moody Elegance
Wait, didn’t we just say light colors make small spaces feel bigger? Yes, but breaking the rules can sometimes yield stunning results! Using darker colors in a small walk-in shower can create a surprisingly sophisticated, cozy, and dramatic ambiance if done correctly.
- Cocooning Effect: Deep charcoals, rich navies, forest greens, or even black tiles can make the shower feel like an intimate, luxurious jewel box. This works particularly well when contrasted with lighter elements elsewhere in the bathroom.
- The Balancing Act:
- Lighting is Crucial: Ensure excellent artificial lighting (see point #10!) and, if possible, natural light to prevent the space from feeling like a cave.
- Glossy Finishes: Dark tiles with a glossy finish will reflect light, adding dimension and preventing the color from feeling too flat or heavy.
- Contrast: Pair dark shower walls with a lighter floor tile or lighter fixtures (chrome, brass) to provide visual relief.
- Keep it Contained: Maybe just use dark tiles on the shower floor and one wall, keeping the others lighter.
- Grout Matters: Using a contrasting light grout with dark tiles can look graphic and modern, while a matching dark grout creates a more seamless, monolithic appearance.
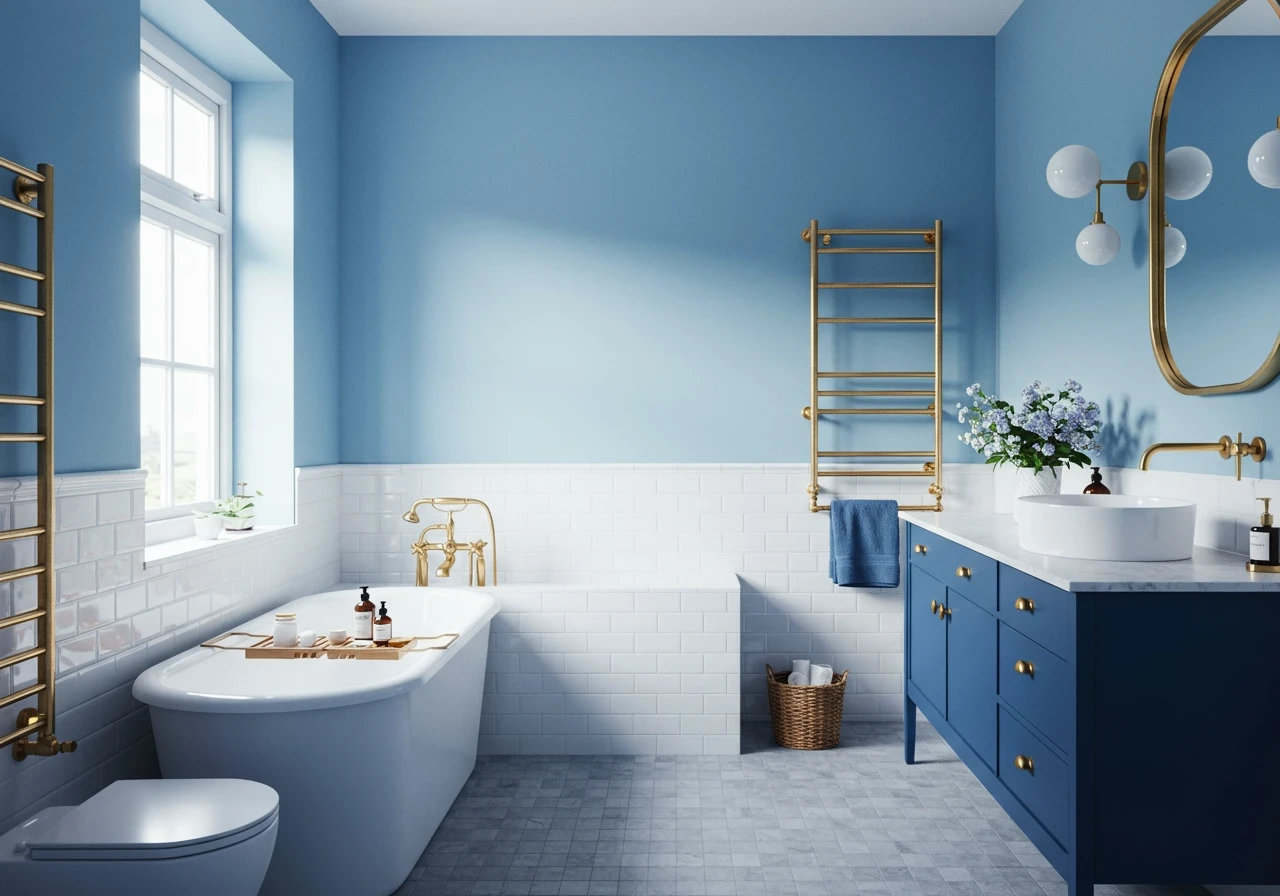
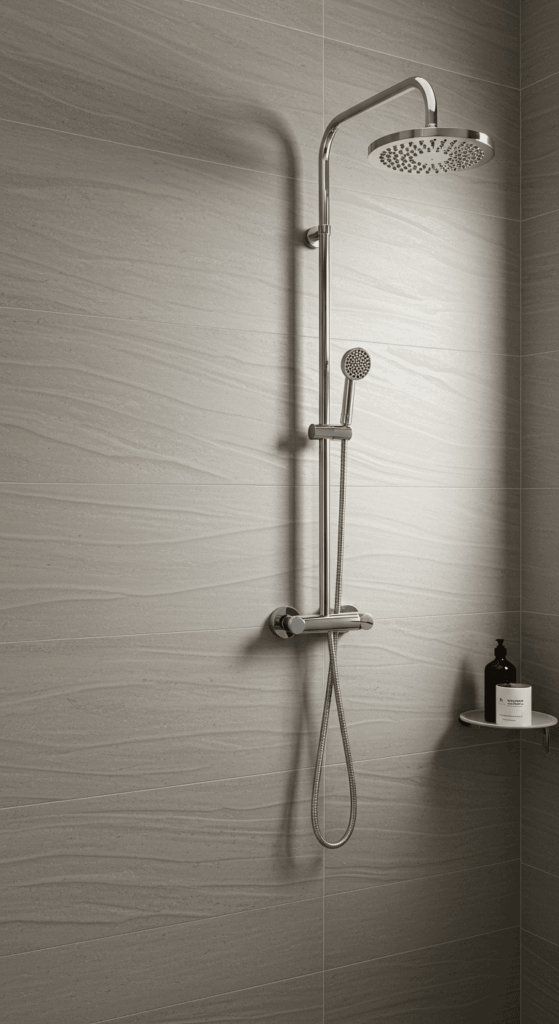
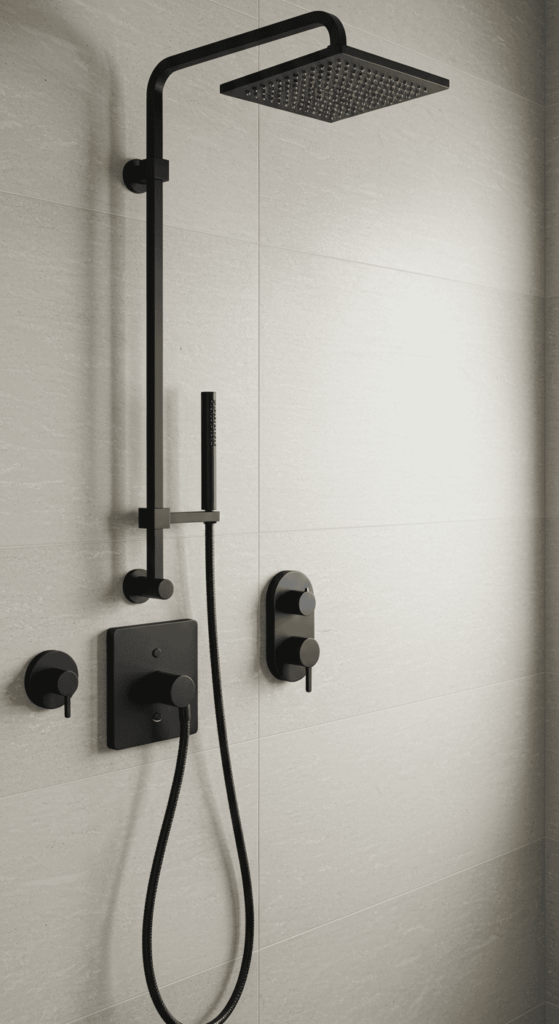
16. Hardware Harmony: Choose Finishes Wisely
The details make the design! The finish and style of your shower fixtures – the showerhead, controls, drain cover, and even the glass enclosure hardware – significantly impact the overall look and feel, especially in a small bathroom.
- Cohesive Coordination: Aim for consistency. Choose one primary metal finish (like matte black, brushed brass, polished chrome, or brushed nickel) and use it for all your fixtures within the shower and ideally throughout the bathroom. This creates a polished, intentional look rather than a jumbled one.
- Finish Impact:
- Light & Bright: Polished chrome or nickel reflects light and feels clean and classic, often blending seamlessly.
- Warm & Luxe: Brushed brass or gold adds warmth and a touch of glamour. It pairs beautifully with both light and dark tiles.
- Modern & Edgy: Matte black provides a strong graphic contrast, especially against light tiles, offering a contemporary edge.
- Minimalist Profiles: Opt for fixtures with sleek, simple designs. Bulky, ornate hardware can visually clutter a small shower area. Think streamlined handles and slim showerheads.
17. Frameless & Free: Maximize Transparency
We touched on clear glass earlier, but let’s emphasize the power of going completely frameless with your glass enclosure (or single panel).
- Uninterrupted Views: Frameless glass panels use minimal hardware (usually just small clips or hinges) and eliminate the visual bulk of metal frames around the edges. This lack of visual interruption makes the entire bathroom feel more open and continuous, as if the shower isn’t even a separate space.
- Light Flow Maximized: Without frames casting shadows or blocking sightlines, light travels more freely, enhancing brightness and the perception of space – absolutely essential in a small walk-in shower design.
- Sleek & Modern Aesthetic: Frameless enclosures offer a high-end, contemporary look that instantly updates any bathroom. They simply look cleaner and less obtrusive than their framed or semi-framed counterparts.
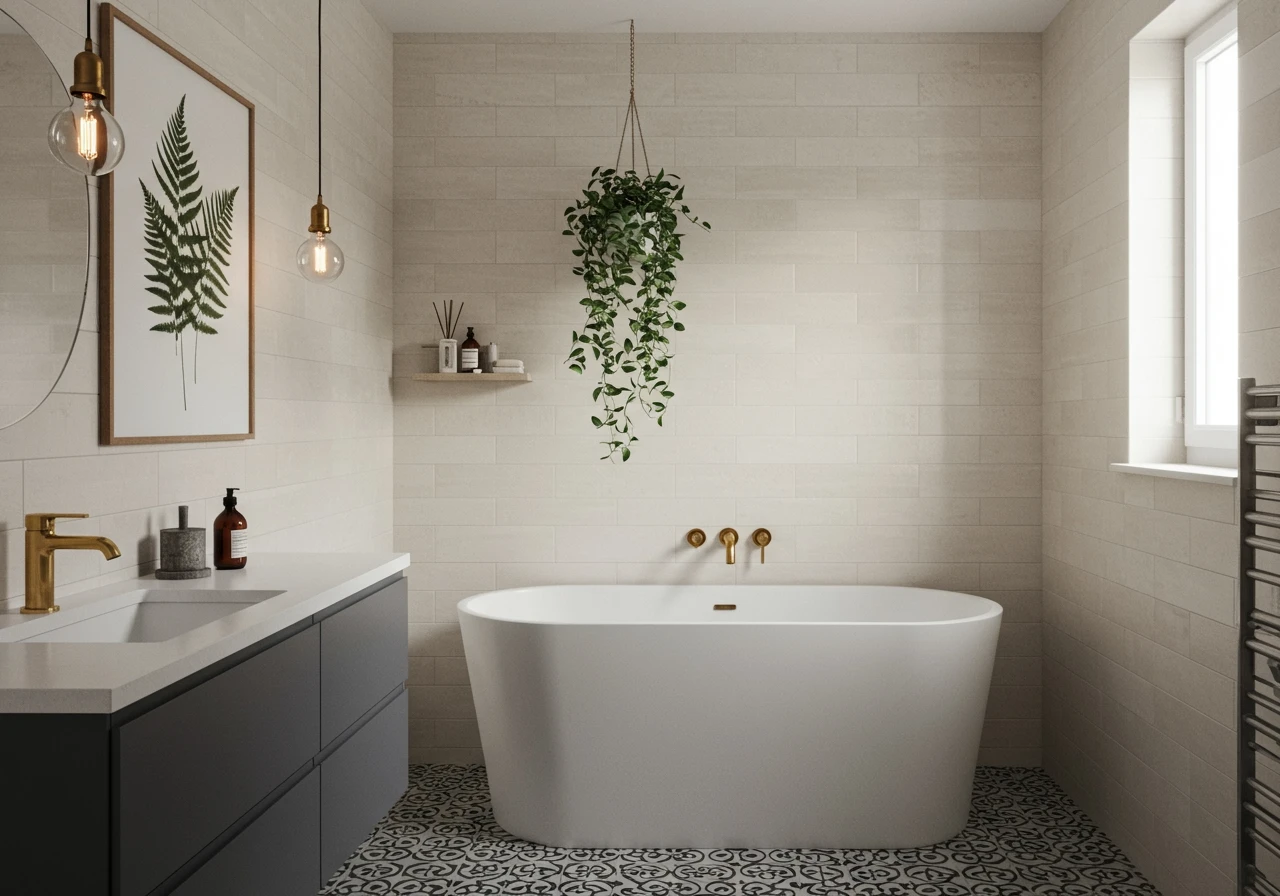
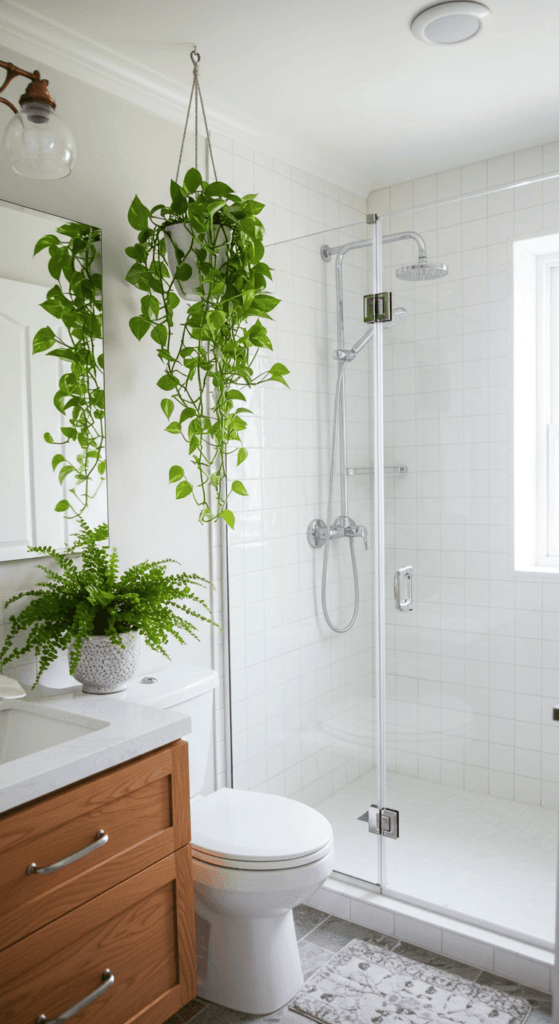
18. Integrate Greenery: Bring Life (Literally!) Inside
Adding a touch of nature can instantly liven up a small bathroom and shower area, making it feel fresher and more inviting.
- Humidity Lovers: Many plants thrive in the humid environment of a bathroom! Consider placing moisture-loving plants like pothos, snake plants, spider plants, orchids, or ferns on a shelf near the shower (but out of direct spray) or even hanging them from the ceiling if space allows.
- Pop of Color & Texture: Greenery adds a vibrant splash of color and organic texture, softening the hard lines of tile and glass. It brings life and a sense of calm to the space.
- Space-Smart Placement:
- Utilize vertical space with hanging planters.
- Place a small potted plant on the corner of a built-in bench (if you have one).
- Add a slim shelf high on the wall outside the immediate splash zone.
- Even realistic faux plants can work wonders if natural light is very limited.
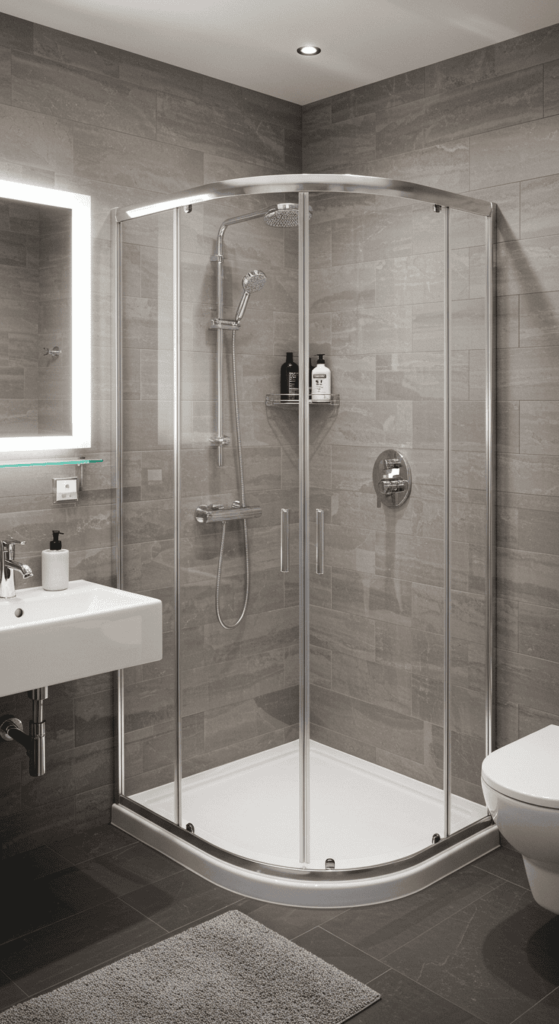
19. Play with Shapes: Think Beyond the Rectangle
While square or rectangular shower footprints are common, sometimes embracing a different shape can be a surprisingly effective space-saving or style-enhancing strategy in a small bathroom.
- Curved Glass: A curved glass enclosure or panel can soften the lines of the bathroom and sometimes requires slightly less floor space than a sharp-cornered equivalent, particularly if it bows outwards slightly where you need elbow room and tucks in tighter at the ends. It adds an element of unique elegance.
- Angled Walls: Similar to the neo-angle concept (#1), strategically angling a wall or a glass panel can help navigate awkward layouts or create a more dynamic flow within the bathroom.
- Custom Fit: Don’t be afraid to consider a custom-shaped glass enclosure if your space is truly unconventional. Sometimes following the unique lines of your room is the best way to maximize every inch.
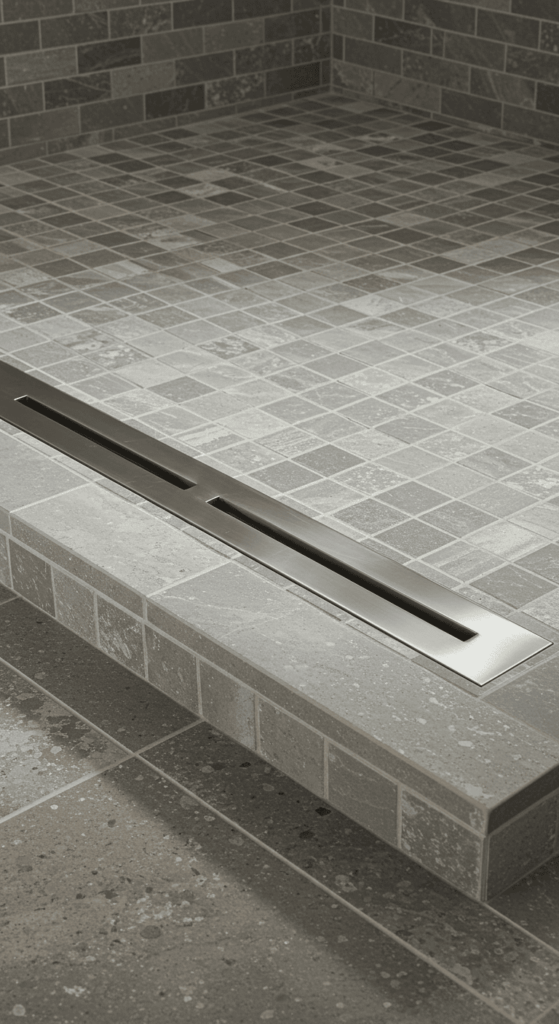
20. Smart Drain Solutions: Function Meets Form
The humble shower drain might seem like a minor detail, but choosing the right type and placement can impact both the look and functionality of your small walk-in shower, especially if you’re aiming for a curbless design.
- Linear Drains: These long, narrow drains are incredibly popular for walk-in showers. They offer a sleek, modern look and are highly efficient at capturing water. They can often be placed discreetly along a wall (usually under the shower fixtures), allowing the main floor area to slope gently in just one direction, which simplifies tiling, especially with large-format tiles.
- Tile-In Drains: For the ultimate seamless look, consider a tile-in drain. This features a cover designed to hold an insert of your surrounding floor tile, making the drain virtually disappear into the floor pattern. Only thin slots around the edges are visible for water to escape.
- Placement Strategy: For curbless showers, precise drain placement and floor slope are critical to contain water effectively. Centered drains require the floor to slope from all directions, which can be tricky with larger tiles. Wall-placed linear drains often simplify this.
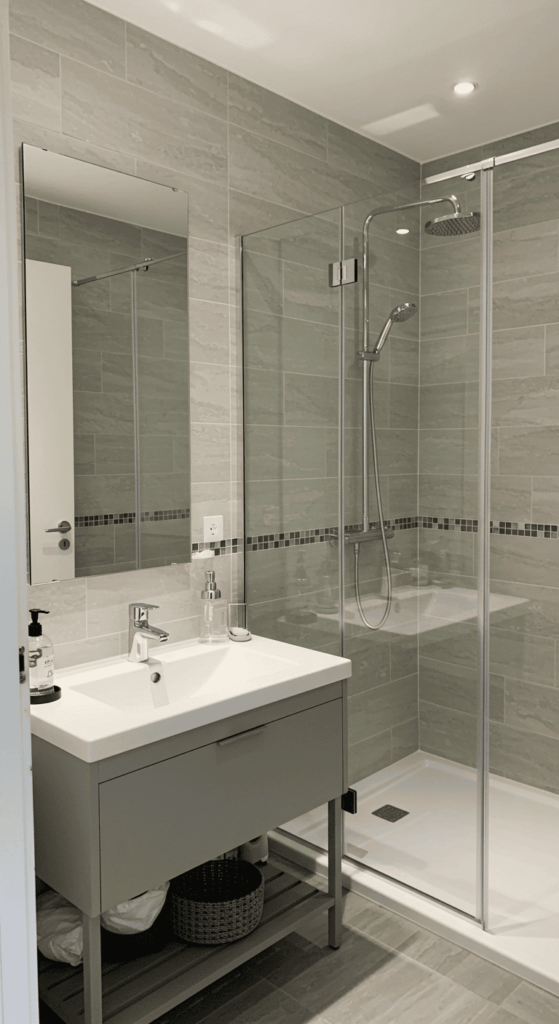
21. Mirror, Mirror on the (Adjacent) Wall: Expand Visual Horizons
While placing a large mirror inside a wet shower isn’t practical (hello, constant water spots and fog!), strategically placing a large mirror on the wall directly outside or adjacent to your clear glass walk-in shower can work wonders for amplifying the sense of space.
- Reflected Depth: A mirror reflects the shower interior and the rest of the bathroom, creating an illusion of doubled space. When you glance towards the shower, the reflection makes the entire area feel deeper and more expansive than it really is.
- Light Amplification: Just like glossy tiles, mirrors are fantastic light bouncers. A mirror positioned opposite a window or near light fixtures will grab that light and throw it back into the room, including into the transparent shower enclosure, making the whole bathroom brighter.
- Seamless Extension: When paired with a frameless glass shower, a well-placed mirror can make the shower enclosure almost seem to disappear, further blurring the lines and enhancing the open-concept feel. Consider a mirror that extends from the vanity right up to the edge of the shower glass for maximum impact.
Your Small Bathroom Shower Sanctuary Awaits!
See? Having a small bathroom doesn’t mean sacrificing style or luxury. With clever planning, thoughtful design choices, and a touch of creativity, your compact space can absolutely accommodate a stunning and functional walk-in shower.
From embracing corners and seamless floors to playing with light, texture, and smart storage, these ideas prove that limitations can actually breed innovation. A small bathroom walk-in shower can open up your floor plan, modernize your aesthetic, and transform your daily routine into a more spa-like experience.
We hope these 21 ideas have sparked your imagination and shown you the incredible potential hiding within your bathroom walls. Don’t be afraid to mix and match concepts, prioritize what matters most to you (be it storage, light, or pure minimalist style), and create a shower space you’ll truly love stepping into every single day.