Hello, fellow creators! There’s a special kind of magic that happens in a sewing room. It’s more than just a space with a machine and some fabric; it’s a sanctuary, a studio, a place where threads of imagination are woven into tangible beauty. But for creativity to truly flourish, your environment needs to be as inspiring as the projects you dream up.
A cluttered, uninspired sewing space can feel like a creative block, while a beautifully organized and personalized room can become your ultimate happy place. Forget generic storage bins and bland walls. We’re here to help you transform your sewing corner, closet, or dedicated room into a haven of style and efficiency.
So, let’s thread the needle and dive into some fabulous sewing room decor ideas that are as practical as they are pretty!
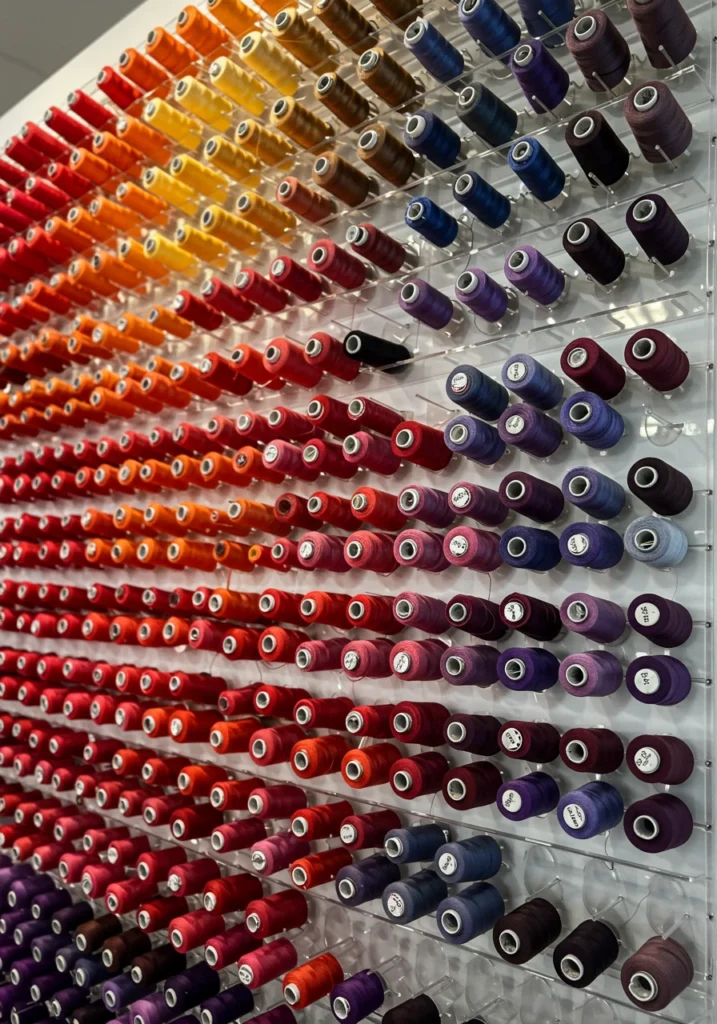
1. Create a “Thread Rainbow” Wall Art
Why hide your beautiful collection of thread when it can be the star of the show? Treating your thread spools as a color palette is one of the most impactful (and satisfying!) ways to decorate your sewing room. This isn’t just storage; it’s functional art.
By organizing your thread by color on wall-mounted racks, you create a stunning visual gradient that’s both breathtaking and incredibly practical. No more digging through a messy drawer to find that perfect shade of coral. It’s right there, part of your decor.
- Choose Your Display: Opt for clear acrylic racks for a modern, floating look, or go for classic wooden spool racks that you can paint to match your room’s aesthetic.
- Location is Key: Place your thread wall in a spot with good lighting but away from direct, harsh sunlight, which can fade the colors over time.
- Go Big: Don’t be afraid to dedicate a significant portion of a wall to this feature. A larger display has a more dramatic and inspiring effect.
For a gallery of stunning examples, browse these beautiful sewing rooms to see how others have turned their supplies into masterpieces.
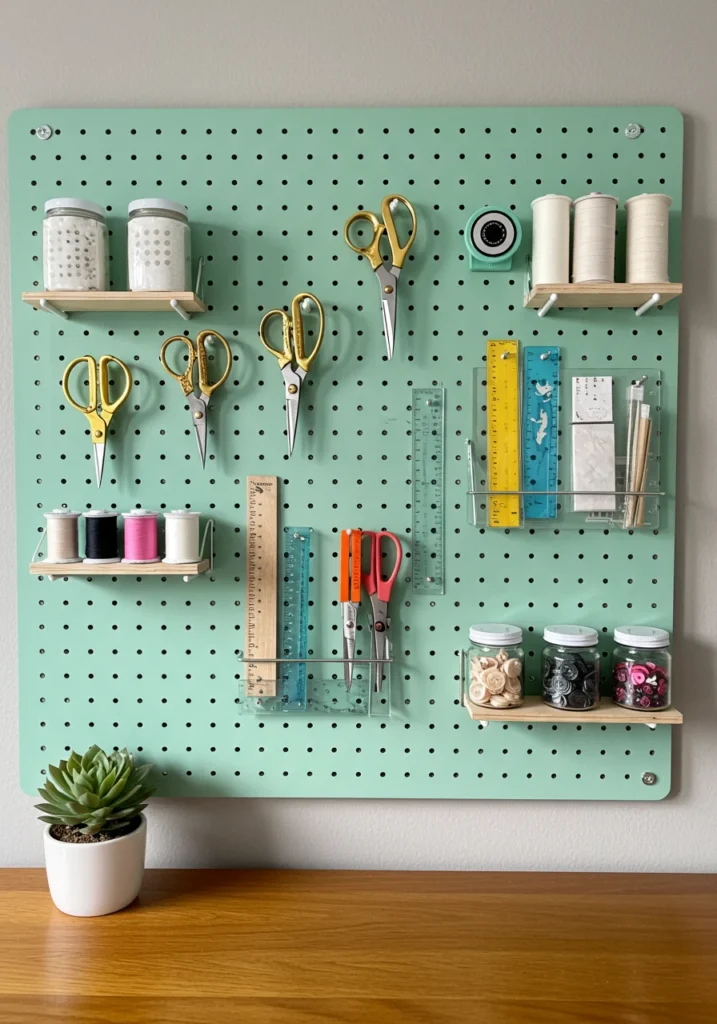
2. Build a “Vertical Village” Pegboard
When desk space is prime real estate, the only way to go is up! A pegboard is a sewer’s best friend, but we’re not talking about a dusty garage organizer. Think of it as a customizable “vertical village” for your most-used tools. It keeps everything visible, accessible, and off your cutting mat.
The beauty of a pegboard is its complete flexibility. You can arrange and rearrange hooks, baskets, and shelves to perfectly suit your current project’s needs. This is an absolute game-changer, especially if you’re working with limited square footage. Learn more about creating an amazing sewing space in tight quarters.
- Customize It: Paint your pegboard a bold accent color or a soft pastel to integrate it into your decor scheme.
- Accessorize Wisely: Use a mix of hooks for scissors and rotary cutters, small shelves for jars of buttons or notions, and dowel rods for holding ribbons or washi tape.
- Create Zones: Group similar items together—a cutting zone with all your blades and rulers, a marking zone with chalk and pens, etc.
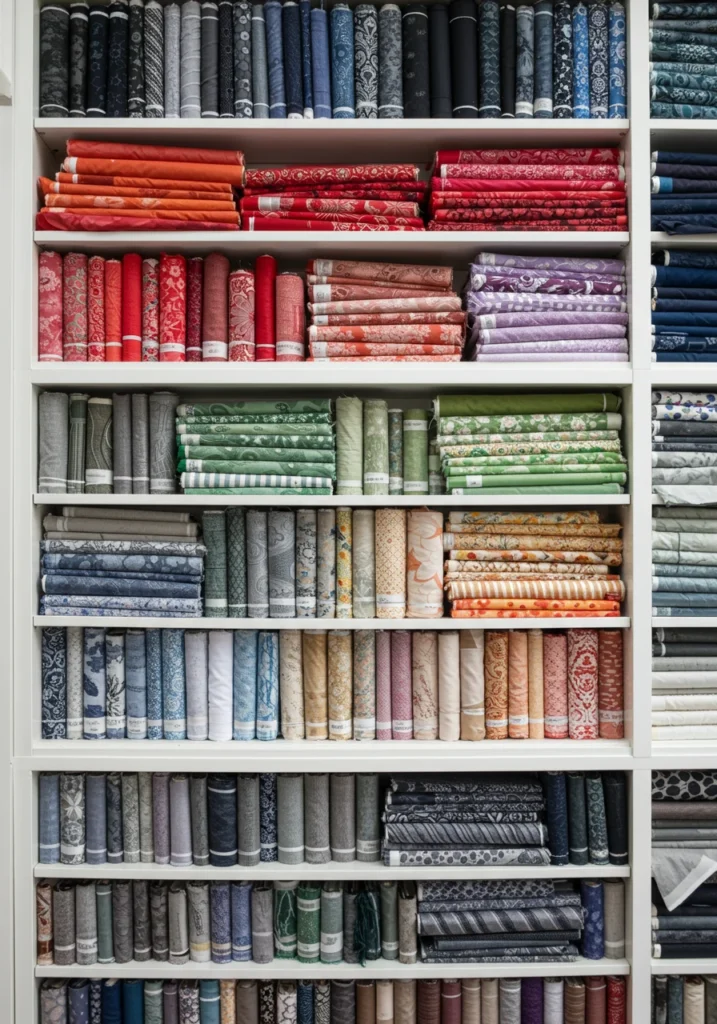
3. Curate a “Fabric Library” Instead of a Stash
Let’s change our mindset. It’s not a “fabric stash”; it’s a “fabric library.” This simple shift in language encourages you to treat your beautiful textiles with the care and reverence they deserve. Instead of stuffing them into bins, display them proudly on open shelving.
This approach turns your collection into a visual catalog of possibilities, making it easier to “shop” your own library for your next project. It also helps you keep track of what you have, preventing duplicate purchases and inspiring new color and pattern combinations.
- The Pro Folding Trick: For a perfectly uniform look, fold your fabric around comic book boards or thin cuts of foam core. This creates neat, stackable “bolts” that look incredibly professional.
- Organize Intuitively: Arrange your fabric library in a way that makes sense to you. Popular methods include organizing by color, by fabric type (cottons, knits, linens), or even by project.
- Mix in Decor: Intersperse your fabric stacks with small plants, inspiring books, or sentimental objects to break up the color and add personality.
Seeing how others organize their collections can be a huge motivator. Take a peek at how one quilter renovated her attic into a dreamy workspace.
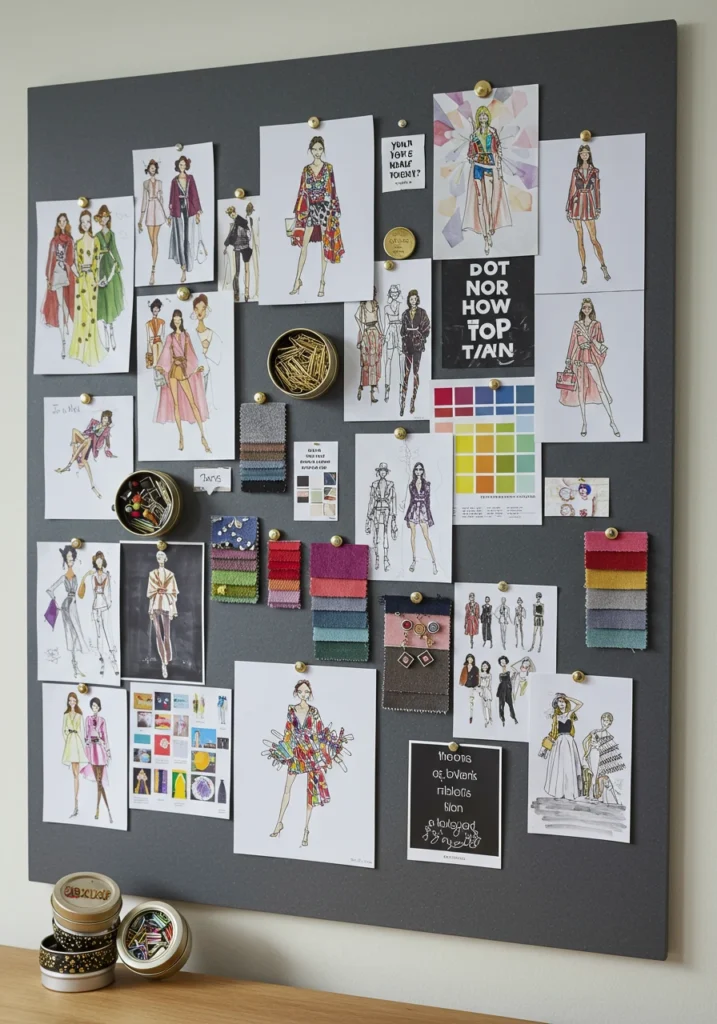
4. Design a Dynamic Inspiration & Magnet Board
Every creative needs a space to brainstorm. Move beyond the basic corkboard and create a chic and dynamic inspiration board using a large sheet of metal or magnetic wall paint. This modern approach is sleek, versatile, and allows for endless rearrangement without leaving pinholes everywhere.
This becomes the command center for your creativity. It’s a living, breathing mood board where you can map out your projects from the first spark of an idea to the final color palette. It’s the perfect place to keep your vision front and center.
- What to Pin: Use stylish magnets to hold up fabric swatches, pattern sketches, inspirational tear-outs from magazines, and color chips.
- Magnetic Storage: Take it a step further with magnetic accessories. Small, clear-topped tins are perfect for holding pins, clips, and stray buttons, keeping them handy but off your workspace.
- Frame It: For a polished look, frame your metal sheet with a decorative picture frame moulding that matches your room’s style.
This kind of creative hub is a cornerstone of a well-planned room. For more foundational tips, check out this ultimate guide to setting up your sewing space.
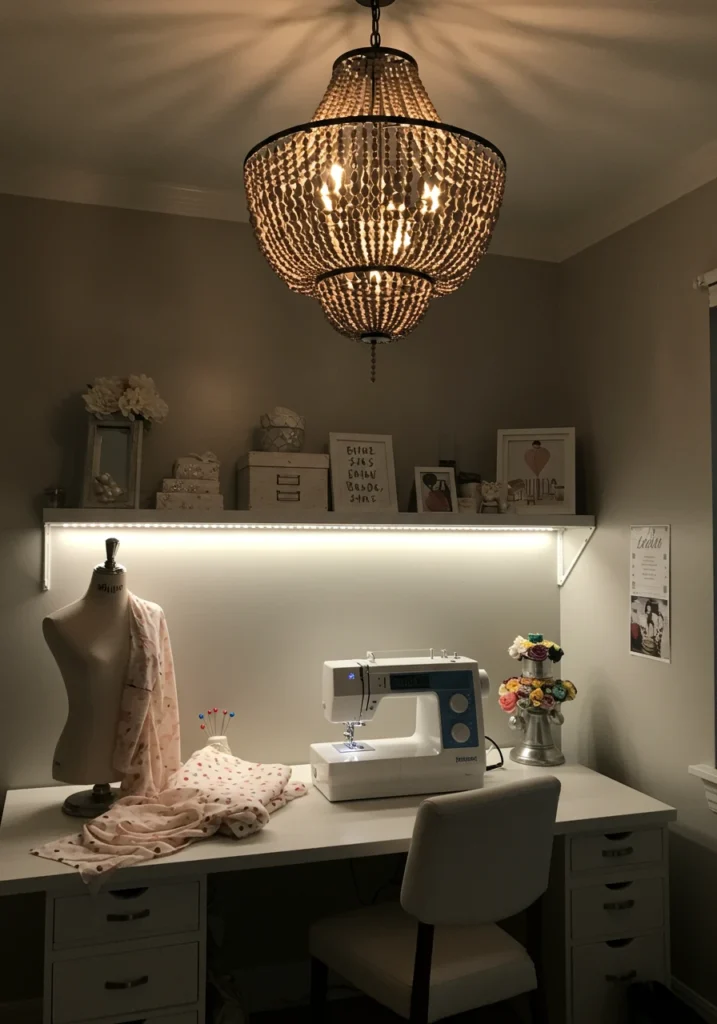
5. Master the Mood with Layered Lighting
Good lighting in a sewing room isn’t a luxury; it’s a necessity. Straining to see your stitches is a recipe for headaches and mistakes. But functional lighting doesn’t have to be boring! The secret is to use layered lighting—a combination of ambient, task, and accent lights to create a space that’s both brilliantly functional and beautifully atmospheric.
- Ambient Light: This is the overall illumination. Swap out a basic fixture for a beautiful chandelier or a stylish semi-flush mount light to add a dose of personality.
- Task Light: This is your focused, bright light for detailed work. Install under-cabinet LED strip lighting above your cutting table and sewing machine area. It illuminates your entire workspace without creating shadows. A flexible desk lamp is also a must-have right next to your machine.
- Accent Light: A small, warm lamp on a shelf or a picture light over a piece of art can add a cozy, inviting glow for those late-night creative sessions.
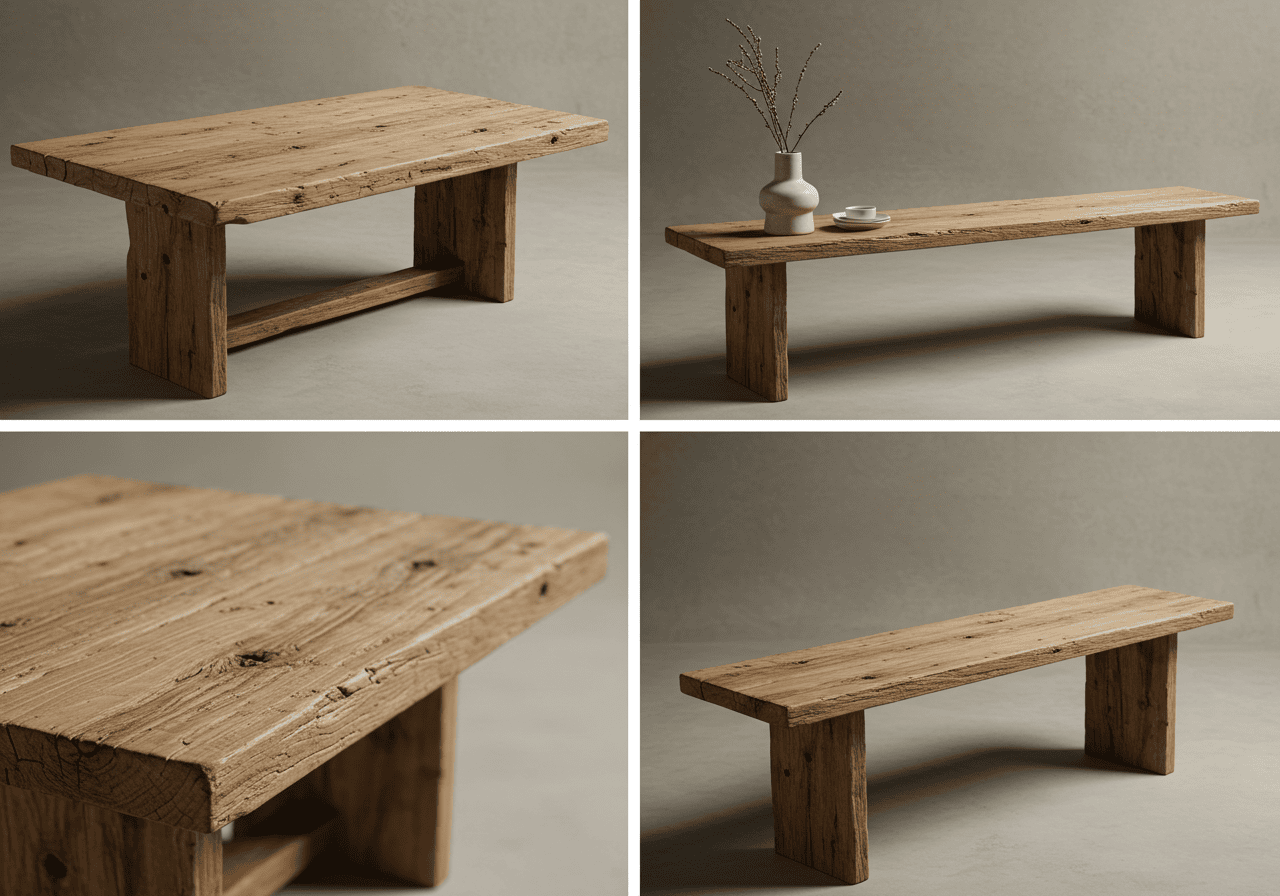
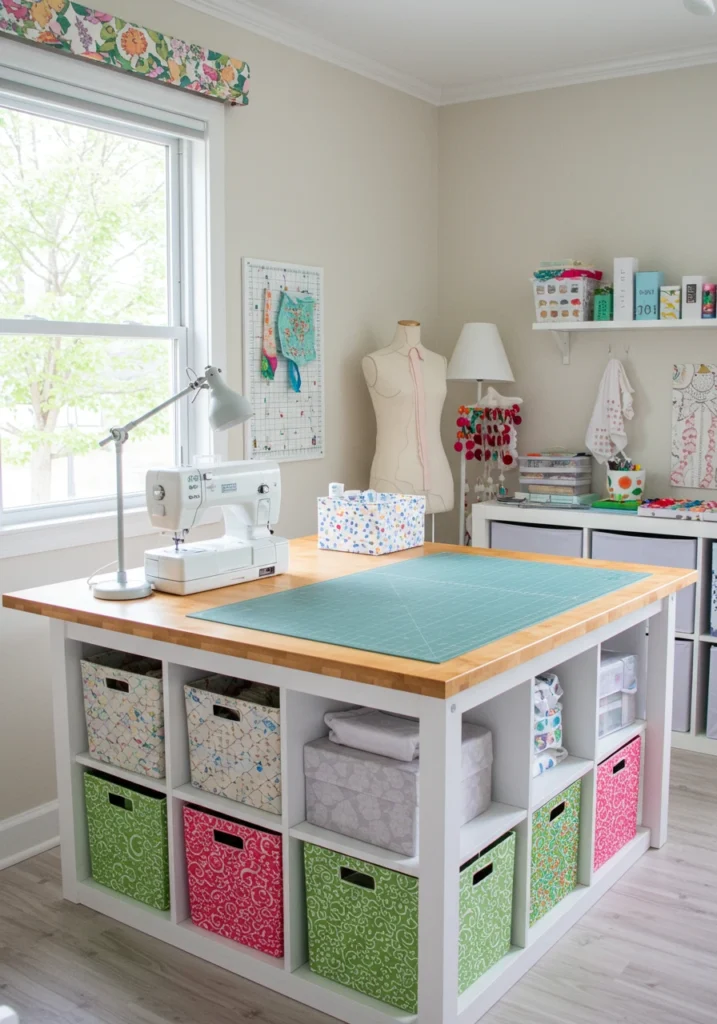
6. Elevate Your Craft with the Ultimate Cutting Island
Say goodbye to hunching over the dining room table! A dedicated, counter-height cutting surface will save your back and streamline your workflow. An “island” is the perfect centerpiece for a sewing room, providing a large surface area for laying out patterns and fabric, plus a ton of storage potential below.
This is your chance to get creative. A kitchen island from IKEA, two cube-storage units (like the IKEA KALLAX) placed back-to-back with a large tabletop attached—the options are endless. The goal is a sturdy, comfortable-height surface with accessible storage for your most-used items.
- Think Height: Aim for a surface that is at a comfortable standing height for you, typically between 36 and 38 inches.
- Storage Solutions: Use the cubbies underneath for baskets of patterns, folded fabric, or project bins.
- Surface Matters: Add a large, self-healing cutting mat to the top to protect the surface and make cutting a breeze.
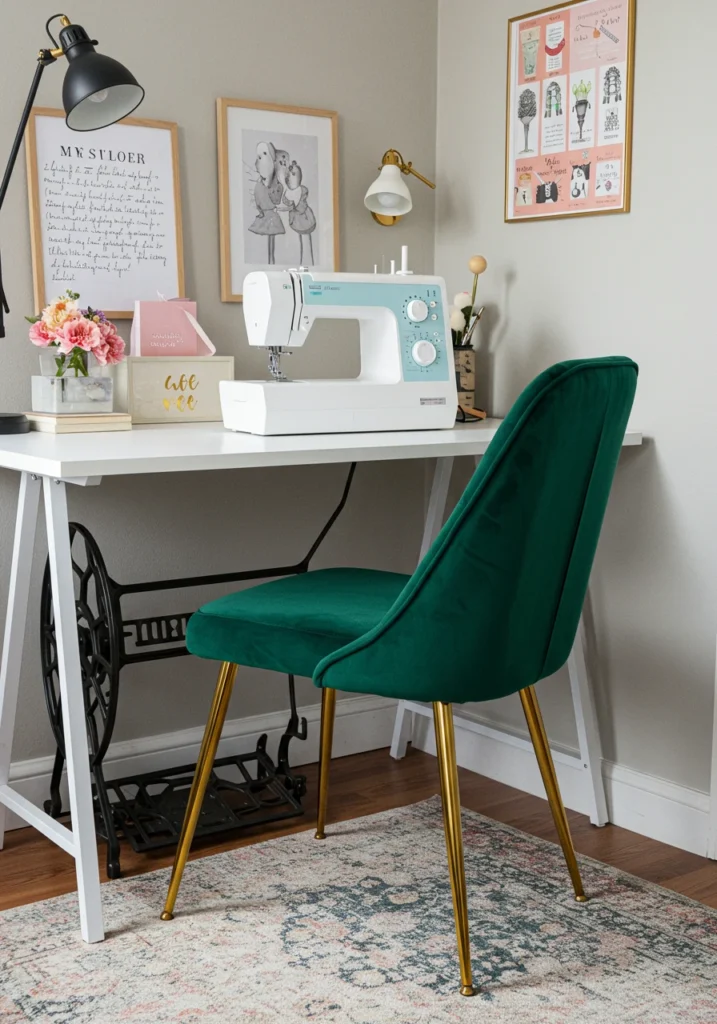
7. Find Your “Throne of Creation”: The Perfect Sewing Chair
You spend hours in this chair, so it should be two things: incredibly comfortable and a joy to look at. An ergonomic office chair is a fantastic choice for back support, but don’t feel limited to basic black. Find one that injects some personality into your space!
A stylish task chair in a vibrant color like mustard yellow, teal, or even a chic floral pattern can become a stunning focal point. Look for features like adjustable height, lumbar support, and smooth-rolling casters so you can glide effortlessly between your sewing machine and cutting table.
- Prioritize Ergonomics: Your back will thank you! Ensure the chair promotes good posture.
- Fabric Choice: A durable fabric like velvet, tweed, or a tight-weave canvas looks luxurious and holds up well.
- Express Yourself: This is an easy way to add a pop of color and high-end design appeal to your room.
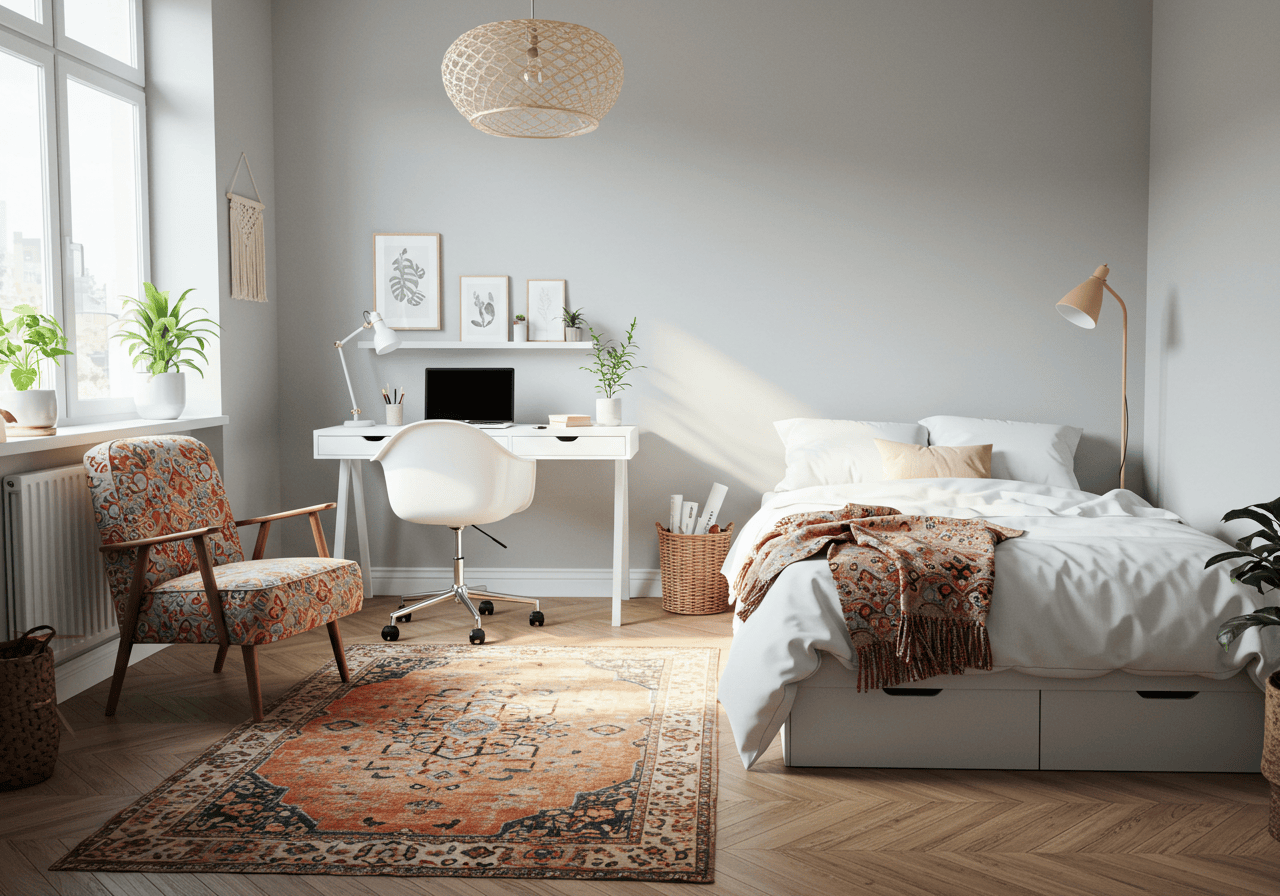
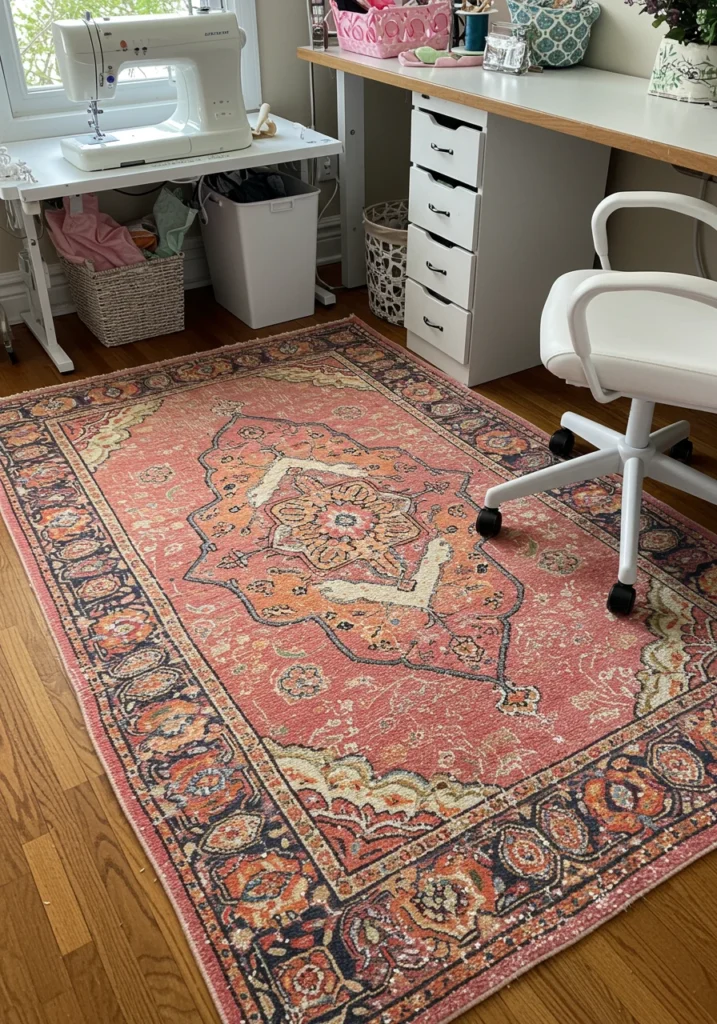
8. Roll Out the Creativity with the Perfect Rug
A rug does more than just decorate the floor; it anchors the space, adds a layer of comfort and warmth, and can help absorb sound from your sewing machine. It’s the finishing touch that ties the whole room together.
When choosing a rug for a sewing room, practicality is key. Opt for a low-pile or flatweave rug. Why? Dropped pins are easier to spot, and it’s much easier to roll your chair around without getting stuck.
- Pattern Power: Don’t be shy with patterns! A busy, multi-colored pattern (like a vintage-inspired floral or a geometric design) is excellent at hiding stray threads and tiny fabric scraps between cleanings.
- Size It Right: Make sure the rug is large enough that the legs of your main furniture (desk, chair) sit comfortably on it.
- Comfort is King: A soft surface underfoot makes long periods of standing and cutting much more pleasant.
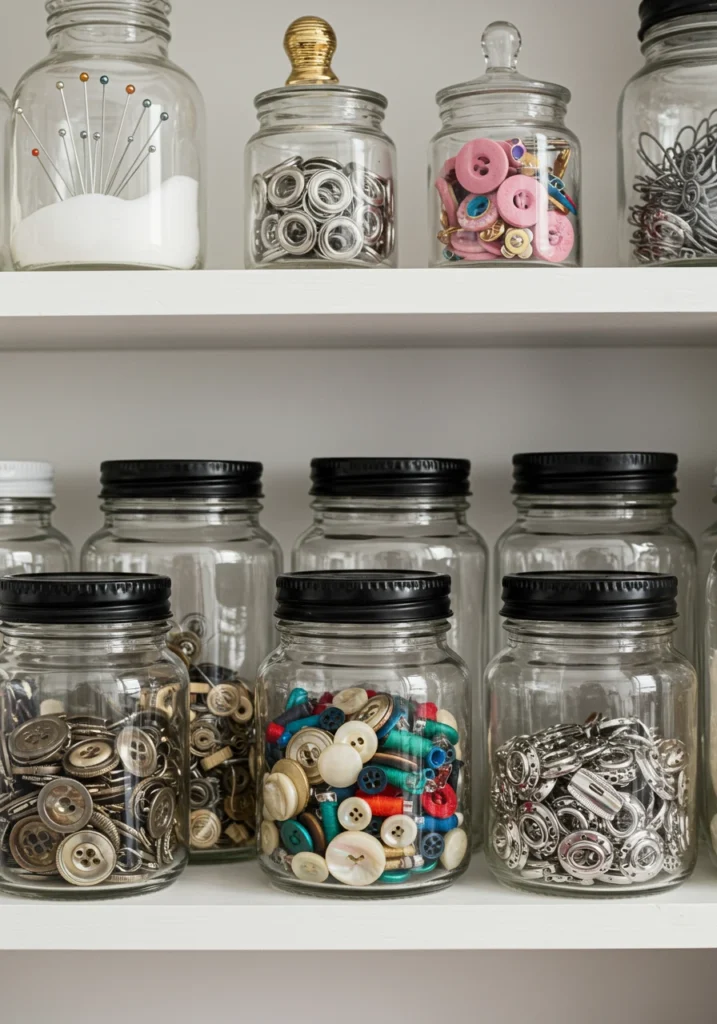
9. Curate “Notion Nooks” for Tiny Treasures
All those little bits and bobs—buttons, beads, snaps, and clips—can easily create clutter. The solution? Decant them from their messy packaging and give them a beautiful new home. Creating intentional “notion nooks” turns practical storage into a charming decorative display.
Think like a vintage apothecary or a chic boutique. Use a collection of clear glass jars, small ceramic bowls, or even a vintage tea set to corral your collections.
- Go Clear: Glass jars are perfect for items you want to identify at a glance, like colorful buttons or shiny snaps.
- Group Like Items: Keep all your marking tools in one pretty pot, your binding clips in a ceramic dish, and your machine needles in a labeled tin.
- Utilize Vertical Space: A small set of spice shelves is perfect for holding rows of small jars.
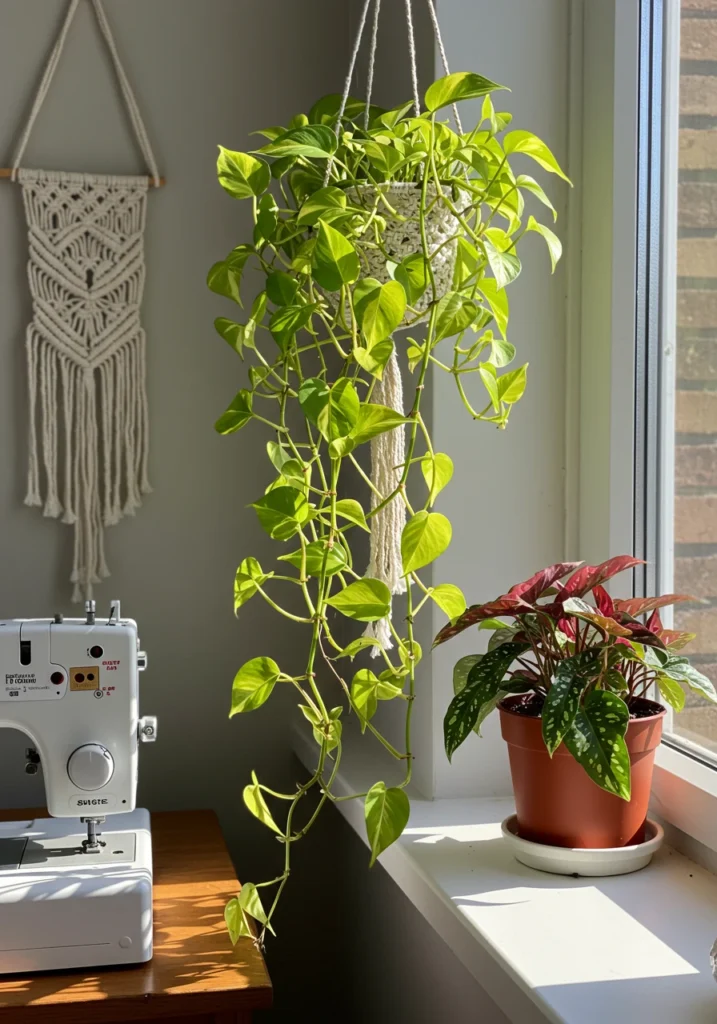
10. Breathe Life Into Your Space with Greenery
Never underestimate the power of plants! Adding a touch of green to your sewing room can instantly make it feel more alive, fresh, and inspiring. Plants are known to boost mood, reduce stress, and improve air quality—all wonderful things for a creative sanctuary.
You don’t need a green thumb to make it work. Choose low-maintenance plants that thrive on a bit of neglect.
- Easy-Care Favorites: Snake plants, ZZ plants, and Pothos are famously resilient and can tolerate a range of lighting conditions.
- Go Vertical: If desk space is tight, use hanging planters or small wall-mounted pots to add greenery without taking up any surface area.
- A Pop of Fun: Choose planters and pots that double as decor, matching your room’s color scheme or adding a fun, sculptural element.
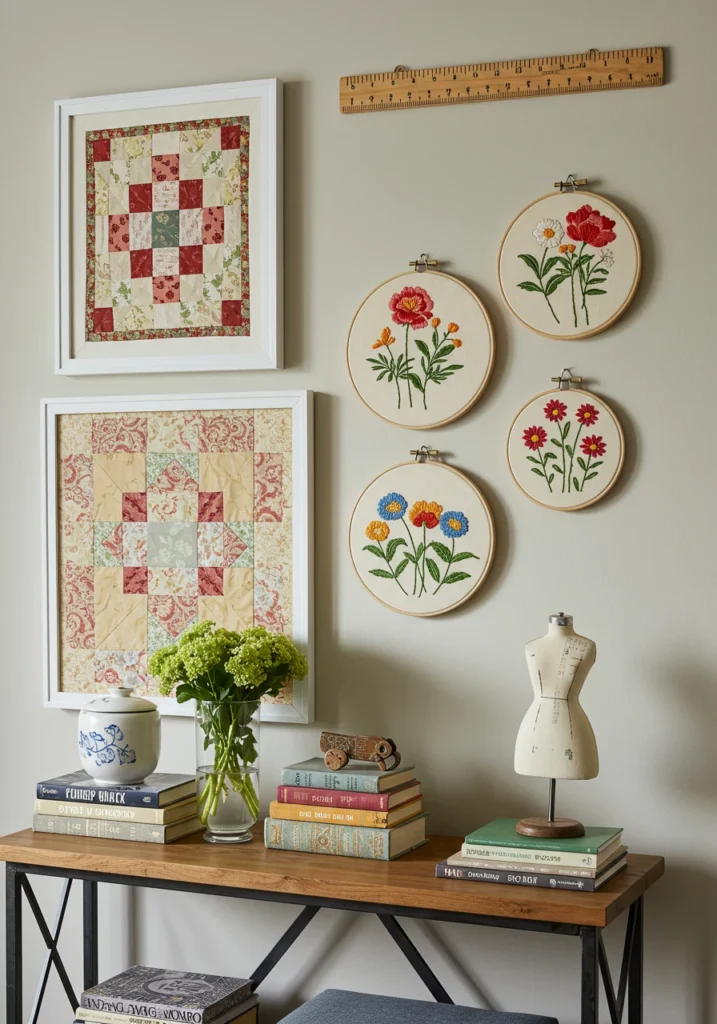
11. Create a “Finished Works” Gallery Wall
What better way to stay motivated than to be surrounded by your own amazing creations? Dedicate a wall in your sewing room to showcasing your talent. A gallery wall of your finished pieces is deeply personal and serves as a powerful reminder of your skills and passion.
This isn’t just about hanging up a quilt. Get creative with how you display your work.
- Frame It Up: Frame a particularly beautiful quilt block, a small piece of hand embroidery, or even a swatch of your favorite fabric.
- Hoop Dreams: Group together several embroidery hoops of different sizes, each displaying a different stitch project or a precious scrap of fabric.
- Wearable Art: Use decorative hooks to hang a special handmade garment, like a beautifully crafted dress or a child’s first custom-sewn outfit.
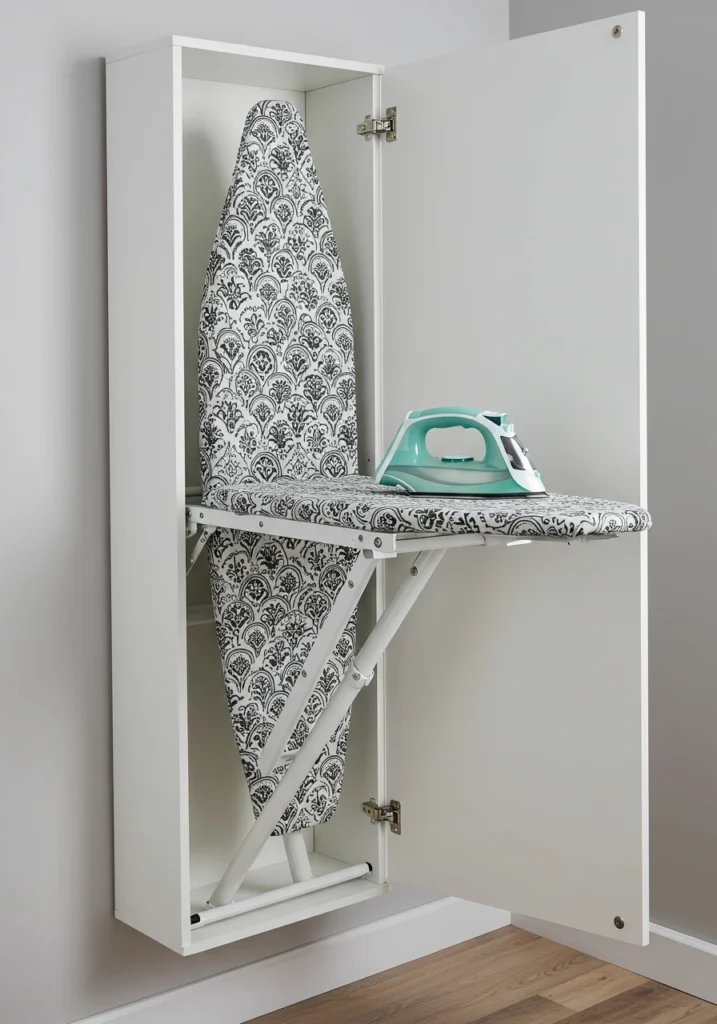
12. Design a Chic & Discreet Ironing Station
An ironing board is an essential tool, but it’s often bulky and awkward to store. Instead of letting it lean in a corner, integrate it seamlessly into your decor. A stylish and efficient ironing station makes this crucial step of the sewing process feel less like a chore.
- Wall-Mounted Wonder: Invest in a fold-down ironing board that’s housed in a shallow wall cabinet. It’s there when you need it and completely hidden when you don’t.
- Custom Cover: This is such an easy and impactful DIY! Make a new ironing board cover using a gorgeous, high-quality quilting cotton that matches your room’s aesthetic.
- Stylish Accessories: Keep a sleek, modern iron and a pretty spray bottle nearby. It’s all in the details!
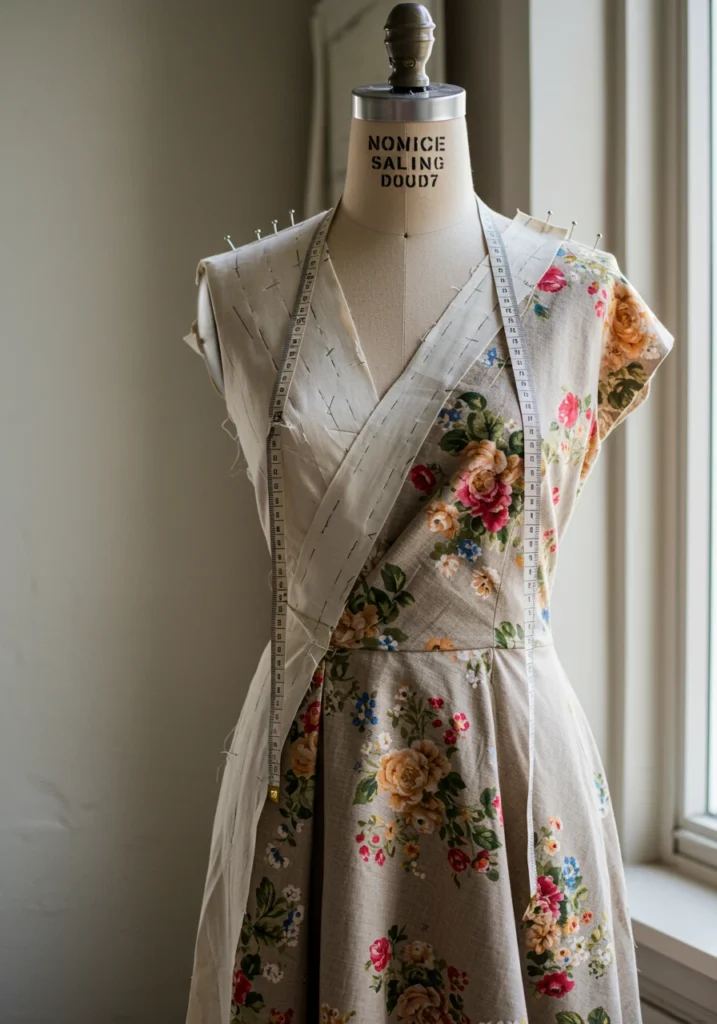
13. Use a Dress Form as Sculptural Art
A dress form is more than just a tool for fitting and draping; it’s a sculptural element that can add a touch of professional elegance to your sewing room. When it’s not being used for a project, treat it like a mannequin in a high-end boutique.
Giving your dress form a permanent, stylish spot in a corner can make the whole room feel more like a dedicated design studio.
- Drape It: Keep a length of beautiful fabric, like lace, tulle, or a silk remnant, artfully draped over its shoulders.
- Accessorize: Adorn it with a statement necklace, a measuring tape worn like a scarf, or a belt from a past project.
- Pin a Mood Board: Use it as a three-dimensional inspiration board, pinning swatches and sketches directly onto it for a project in progress.
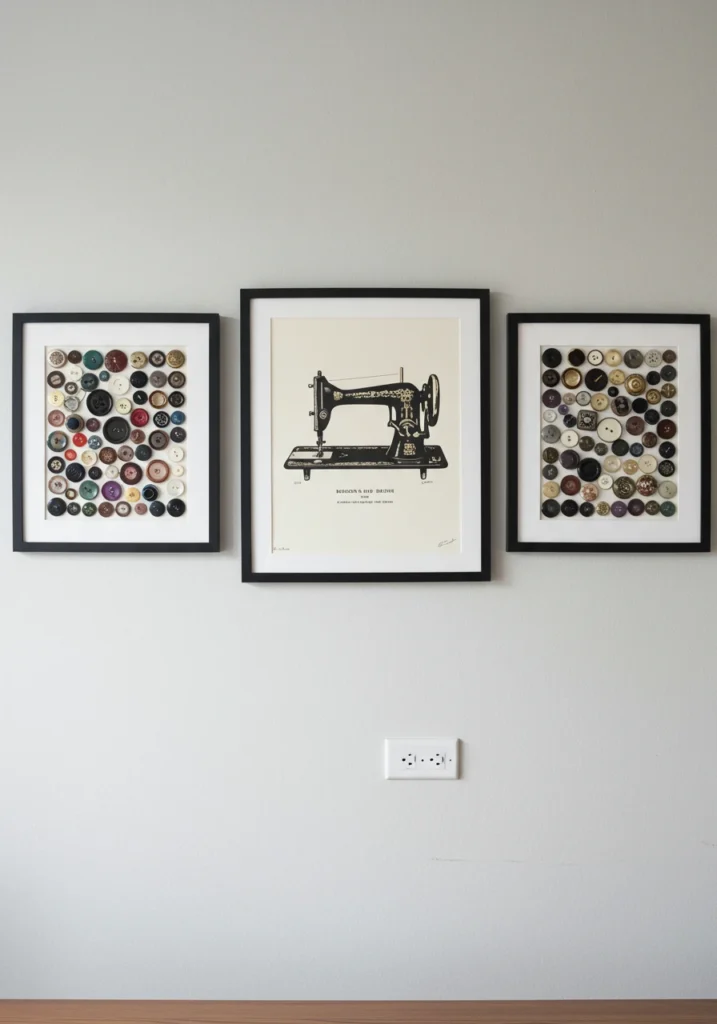
14. Hang Wall Art That Speaks Your Craft
The art on your walls should reflect the passion that fills the room. Move beyond generic prints and choose pieces that speak directly to the art of sewing. This is a fantastic way to infuse your space with humor, history, and personality.
- Vintage Vibes: Frame vintage sewing pattern envelopes. Their illustrations are charming and offer a beautiful glimpse into fashion history.
- Go Big & Bold: Find an oversized, decorative object like a giant pair of wooden scissors or a large, antique-looking spool of thread to mount on the wall as a statement piece.
- Words to Create By: Hang a beautifully designed print with a favorite sewing quote, like “To sew is to pray with your hands” or something more humorous like, “My soul is fed with needle and thread.”
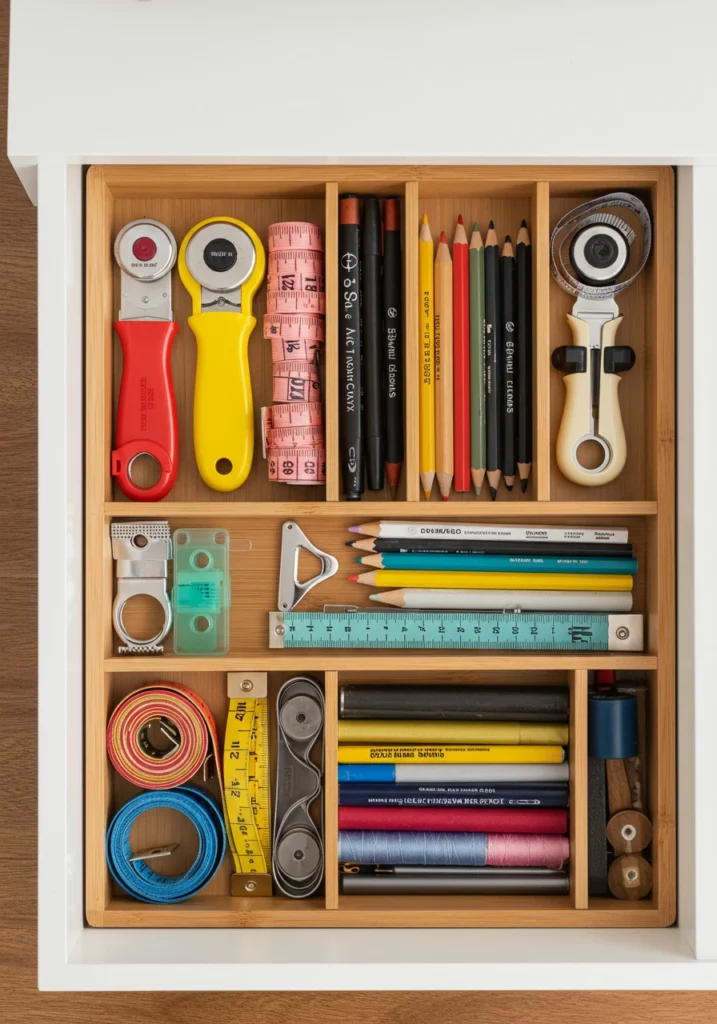
15. Achieve “Drawer Dividends” with Smart Organization
The true test of an organized space is what’s happening inside the drawers. A jumbled mess of tools can instantly derail your creative flow. Bringing order to this hidden space is incredibly satisfying and will make your process so much smoother.
The secret is to divide and conquer. Instead of letting everything roll around freely, create a designated spot for every single item.
- Clear Acrylic Organizers: These are a game-changer. Use modular acrylic trays (often sold as makeup or kitchen utensil organizers) to create custom compartments.
- DIY Dividers: Inexpensive basswood from a craft store can be easily cut and glued to create a custom grid inside any drawer.
- Think in Zones: Dedicate drawers to specific tasks. Have one drawer for all your marking tools, another for cutting tools, and a third for machine feet and accessories.
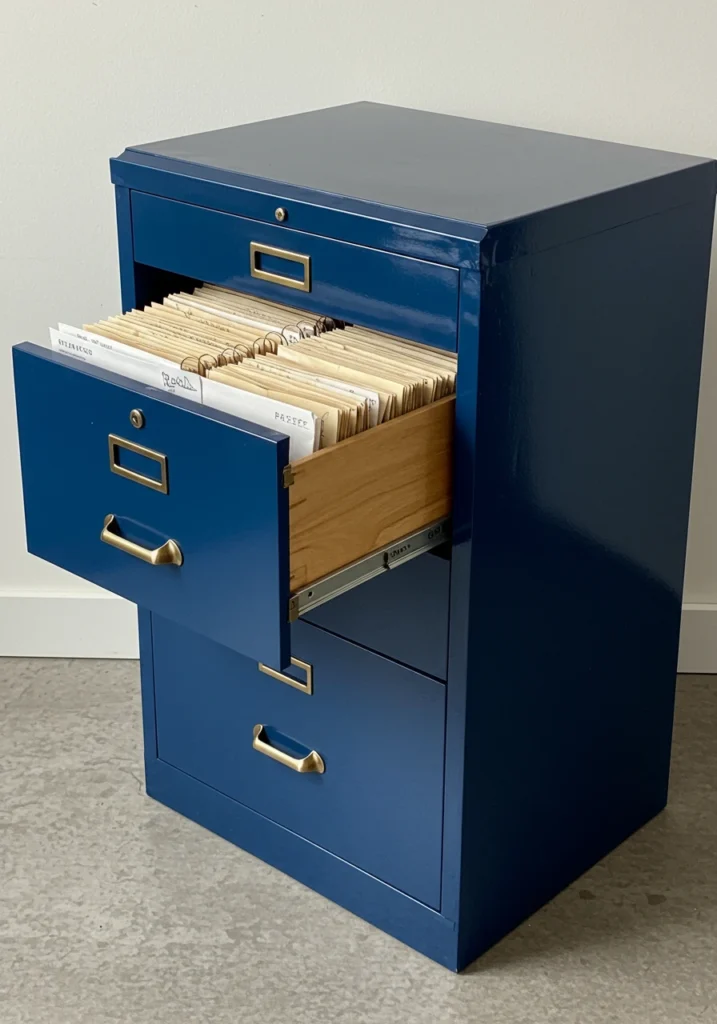
16. Give Patterns a Proper Home with a Vintage Filing Cabinet
Sewing patterns can quickly become a chaotic pile of flimsy envelopes. Elevate your pattern storage from a messy box to a chic and functional system. A vintage metal filing cabinet is a brilliant solution. It offers deep, organized storage and an incredible opportunity for a stylish DIY.
Hunt for one at a thrift store or flea market, give it a fresh coat of spray paint in a fun color like buttercup yellow or dusty rose, and add some elegant new hardware. Suddenly, a boring office staple becomes a major design statement.
- Organize by Category: Use hanging file folders with tabs to organize your patterns by garment type (dresses, tops, pants) or by brand.
- Protect Your Patterns: For delicate or treasured vintage patterns, slip them into clear plastic sleeves before filing to protect them from wear and tear.
- Top It Off: The top of the filing cabinet is the perfect surface for a small lamp, a plant, or your favorite sewing books.
17. Repurpose a Bar Cart for Mobile Notions
Who says a bar cart is just for cocktails? This versatile piece of furniture is a sewer’s dream. A stylish rolling utility or bar cart can serve as a mobile command center for your notions, tools, or even a specific project. You can wheel it right next to your sewing machine when you’re working and tuck it away when you’re done.
Look for a cart with multiple tiers to maximize storage. It’s the perfect blend of form and function, adding a touch of mobile glamour to your creative process.
- Top Tier: Use pretty dishes and trays to hold items you’re currently using, like pins, clips, and your seam ripper.
- Middle Tier: Dedicate this shelf to threads, bobbins, and marking tools. Small baskets or drawer organizers work well here.
- Bottom Tier: This is a great spot for larger items like your tailor’s ham, a mini iron, or fabric scraps for your current project.

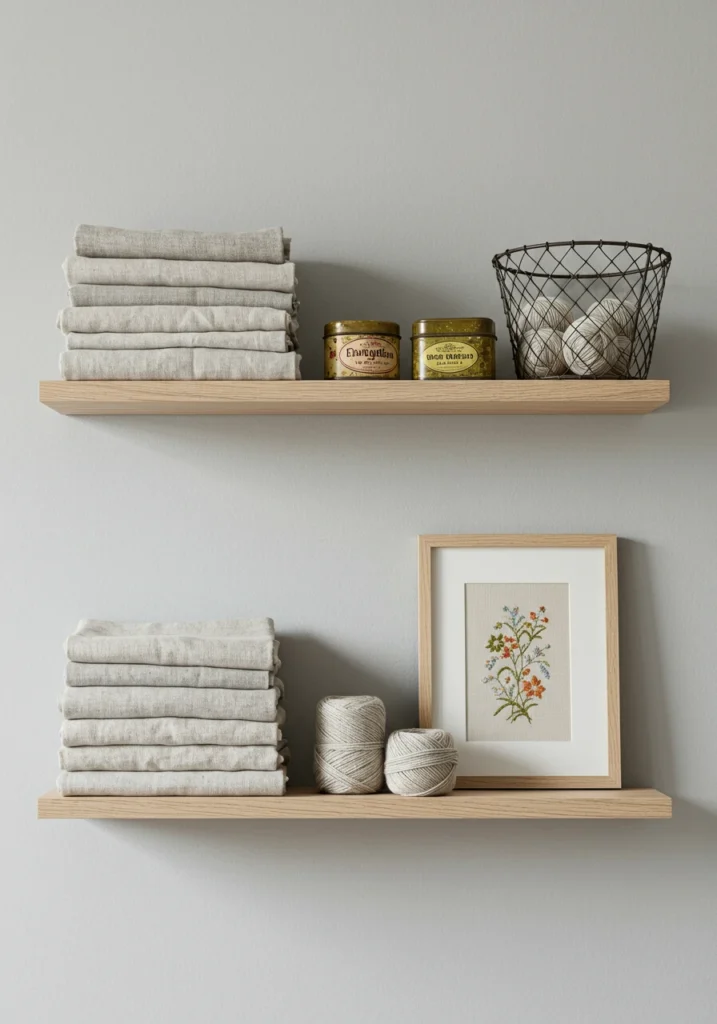
18. Embrace Open Shelving with Curated “Sewing Stories”
Instead of hiding everything away, use open shelving to tell a story. Think of each shelf as a little vignette—a curated collection of items that are both beautiful and useful. This approach forces you to be intentional about what you display, turning clutter into curated collections.
Mix your practical sewing supplies with personal touches to create displays that are uniquely you.
- The Rule of Three: When styling, group items in odd numbers, particularly threes. For example, a stack of three sewing books, a small plant, and a jar of vintage thimbles.
- Vary Height and Texture: Combine tall items (like a vase holding knitting needles) with short items (a bowl of bobbins) and mix textures (wood, glass, metal, fabric) to create visual interest.
- Edit Ruthlessly: The key to beautiful open shelving is negative space. Don’t cram every inch full. Let your favorite items breathe.
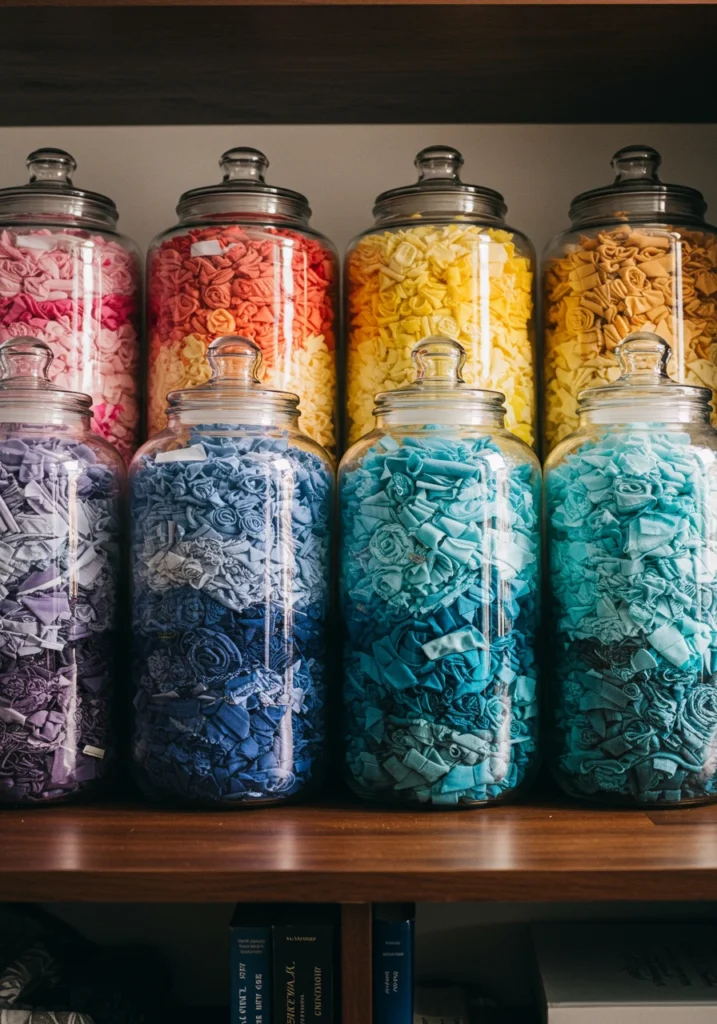
19. Implement a “Scrap Savvy” System
Fabric scraps can multiply faster than rabbits! Instead of letting them become a jumbled mess in a bag, create a “scrap savvy” system that turns them into part of your decor. Sorting your scraps makes them usable and can even spark new project ideas.
Large, clear glass jars or canisters are perfect for this. Sorting your scraps by color and displaying them on a shelf creates a stunning, quilt-like visual.
- Sort by Color: Have one large jar for reds/pinks, another for blues/greens, etc. This creates a beautiful rainbow effect.
- Sort by Size: For quilters, it can be helpful to have designated bins for different pre-cut sizes (2.5″ strips, 5″ squares, etc.).
- The “Use It or Lose It” Basket: Keep one beautiful basket dedicated to scraps you want to use soon. This keeps them top of mind for small projects like pouches or coasters.
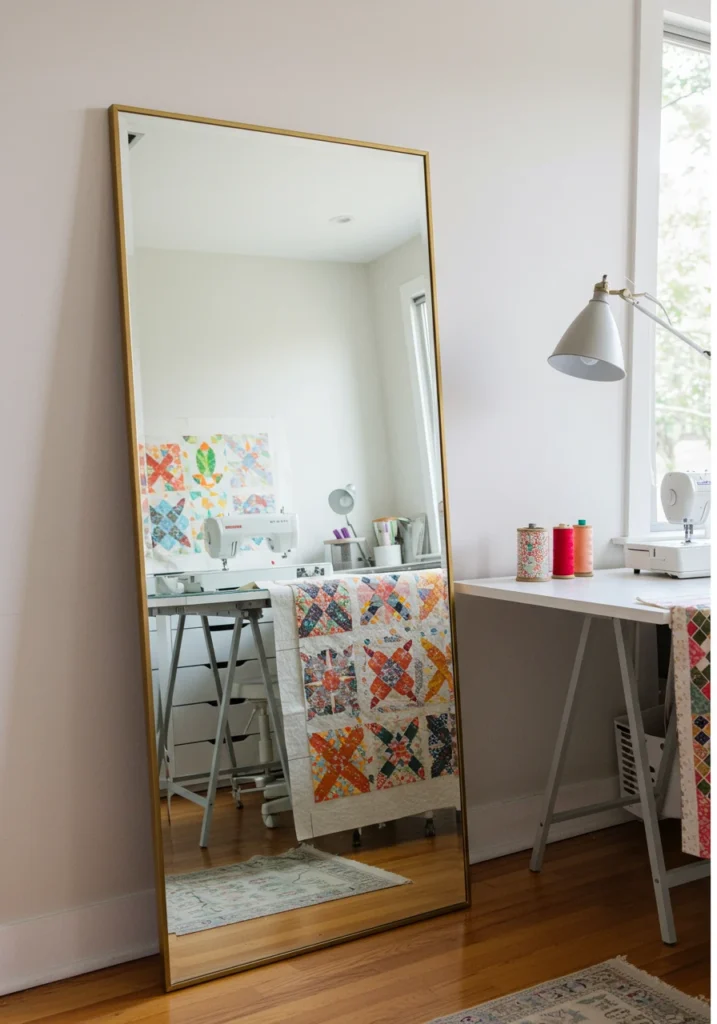
20. Add a Full-Length Mirror for Fit and Light
A full-length mirror is an incredibly practical and decorative tool for a sewing room. Functionally, it’s essential for checking the fit and drape of garments you’re making for yourself. Aesthetically, it’s a designer’s secret weapon.
A large mirror will instantly make your room feel bigger, brighter, and more open by bouncing natural and artificial light around the space. Choose one with a beautiful frame that complements your style, whether it’s ornate and vintage or sleek and modern.
- Placement is Key: Place the mirror on a wall opposite a window to maximize the reflection of natural light.
- Frame Your Style: The frame is a decorative element. A gold-gilt frame adds glamour, a simple wood frame adds warmth, and a frameless mirror feels modern.
- Lean In: For a relaxed, studio-like feel, simply lean a tall mirror against the wall instead of hanging it.
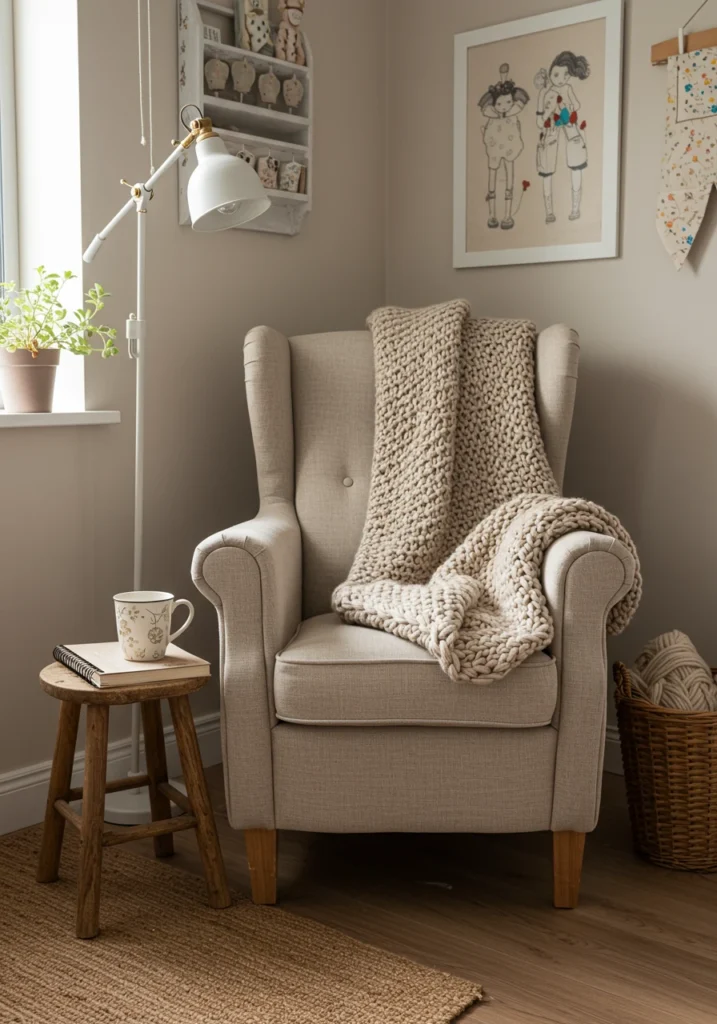
21. Create a Cozy Corner to Dream and Scheme
Every studio needs a space to step away from the work and just think. Carve out a small corner for a comfortable armchair or a small bench. This becomes your dedicated spot for sketching new designs, flipping through pattern books, or simply sipping a cup of tea while you mull over a tricky construction step.
This little zone transforms your room from a pure workspace into a true creative retreat.
- Add Comfort: Drape a cozy, handmade quilt or a soft throw blanket over the chair. Add a plush pillow for back support.
- Include a Small Table: A tiny side table is perfect for holding your sketchbook, a cup of coffee, and a small vase of flowers.
- Personalize It: Hang an inspiring art print above the chair or stack your favorite design books on the floor next to it.
Your Creative Sanctuary Awaits
And there you have it! Your sewing room is so much more than a place to work—it’s a reflection of your passion and a sanctuary for your creativity. By thoughtfully blending function with beauty, you can create a space that not only supports your craft but actively inspires it. Don’t be afraid to let your personality shine through in every detail. Now, go forth and create something beautiful in a space you truly love!